en


 polski
 English
 Deutsch
 Italiano
 Français
 Čeština
 Nederlands


Maxim B2B: Your New Command Center
Get your own quote and order in 2 minutes, 24/7.
No waiting, no technical jargon, and always on your terms.

Video tutorials
Product listings and filters
Want to find the right product quickly?
Watch this short tutorial to learn how product listings and filters work in the Maxim B2B platform. They’ll help you narrow down your results in seconds and find exactly what you need.
Product page
Want to quickly check all the product details?
See how the product card works in B2B Maxim – where to find specifications, variants, available decorations and other key information.
Offer
Discover the possibilities of the offers module in B2B Maxim.
Learn how to prepare a quote for a client in just a few simple steps. In this tutorial, we’ll walk you through the entire process—from adding products to saving the finished quote.
Advanced configurator
Want to create a product exactly to your specifications?
Watch and see how the Advanced Configurator in B2B Maxim works – with full options for branding, dyeing and Pantone color selection.
Simplified configurator
Want to quickly prepare a product with simple labeling?
Watch this tutorial and see how the Simplified Configurator works
in B2B Maxim – perfect for engravings and simple prints.
Placing an order
Learn about the ordering process at B2B Maxim.
Learn how to place an order on the Maxim B2B platform in just a few steps – from selecting an offer to finalizing the order.
*NOTE: Data from your existing account on legacy.maxim.com.pl will not be automatically transferred to b2b.maxim.com.pl .
By creating a new agency account, you will become its owner. If you do not hold this role within your company, please ask your manager to register you.
– – – – – – – – – – – – – – – – – – – – – – – – – – – – – – – – – – – – – – – – – – – – – – – – – – – – – – – – – – – – – –

Graphic tutorials
Registration
Step 1. – Click
Step 2. – Register
Step 3. – Confirm email address
Step 4. – Wait for verification
Step 5. – Click on the link in the email and fill out the details
Step 6 – “Let’s get started”
Step 7. – Access to platform functionalities
Step 8 – Agency Details
Step 9 – Agency Settings
Registration
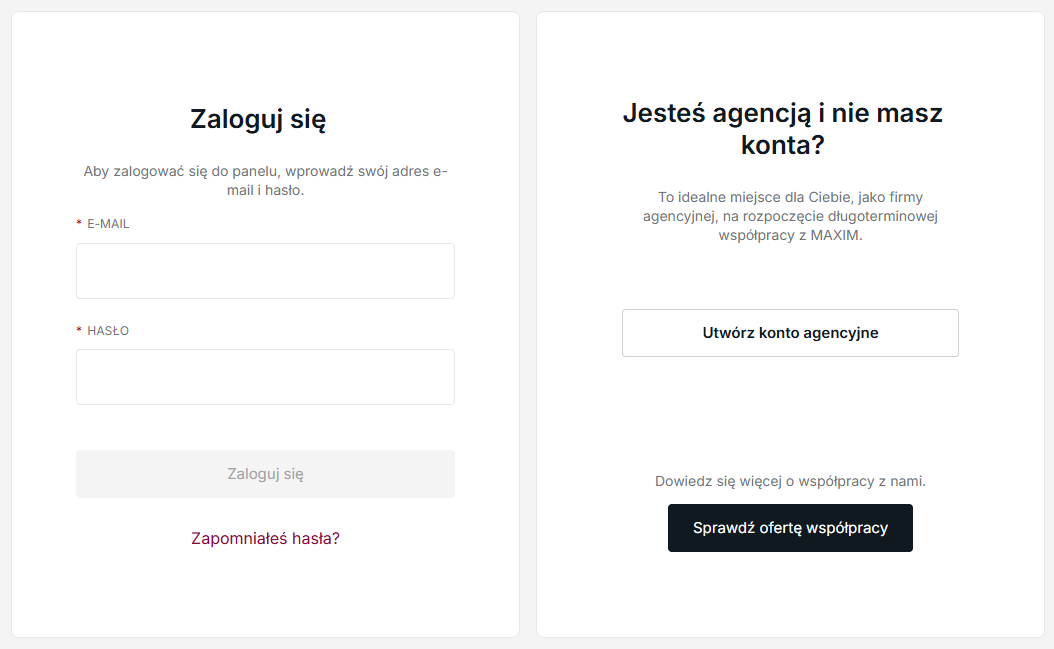
1. Click
Click “Create an agency account”
– – – – – – – – – – – – – – – – – – – – – – – – – – – – – – – – – – – – – – – – – – – – – – – – – – – – – – – – – – – – – –
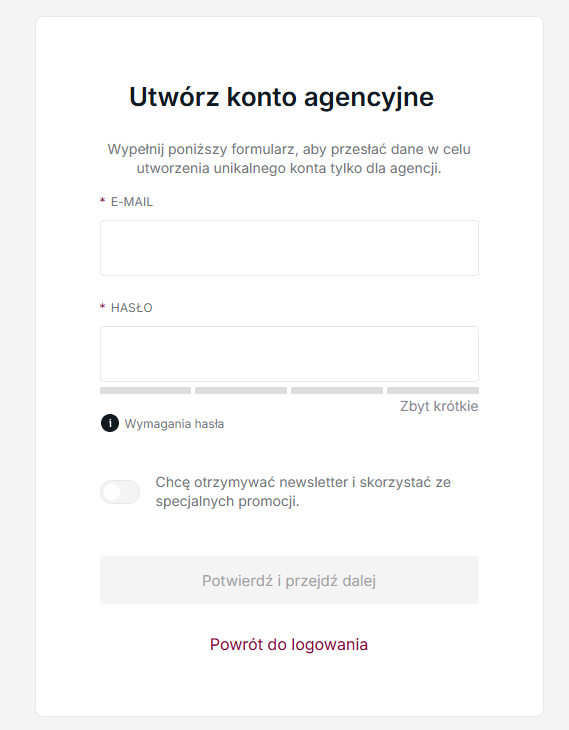
2. Register
Enter the email address and password you wish to use for registration.
Click “Confirm and continue.” The password field must be at least 8 characters long.
Select the marketing consent preferences button.
The password field must contain at least one lowercase and one uppercase letter.
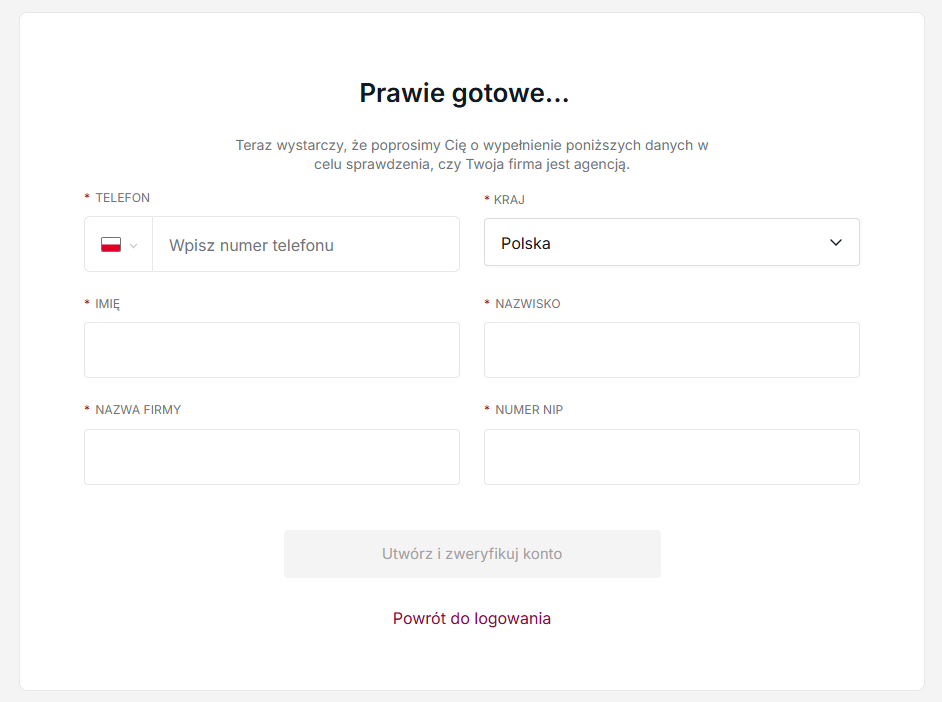
Fill out all the details and press the “Create and verify account” button
– – – – – – – – – – – – – – – – – – – – – – – – – – – – – – – – – – – – – – – – – – – – – – – – – – – – – – – – – – – – – –
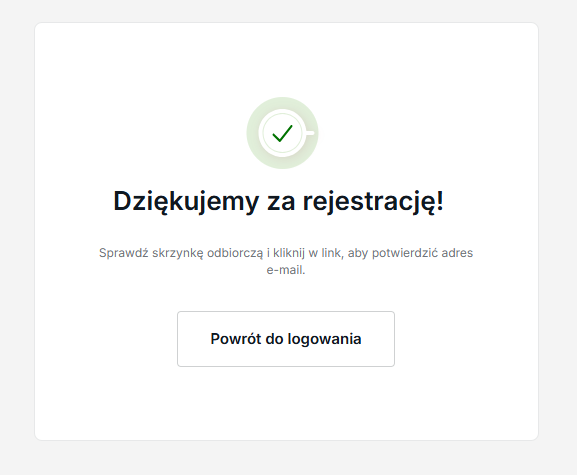
3. Confirm your email address
After clicking, a message will pop up thanking you for registering.
– – – – – – – – – – – – – – – – – – – – – – – – – – – – – – – – – – – – – – – – – – – – – – – – – – – – – – – – – – – – – –
4. Wait for verification
You will receive a message with the above content at the e-mail address provided.
Click on the activation link to confirm compatibility.
The next step is administrator verification. After verifying your details, the Administrator will assign
applicable purchase conditions and the appropriate account manager.
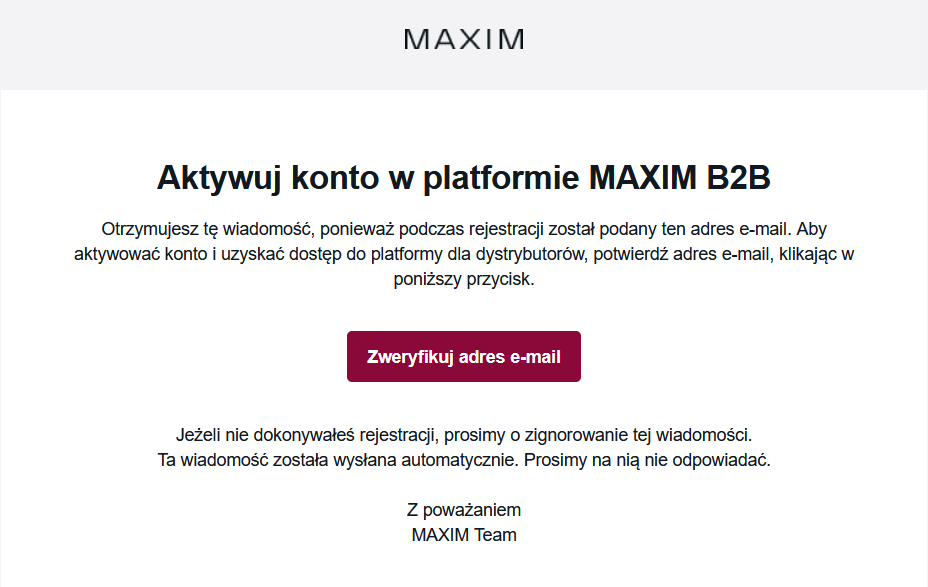
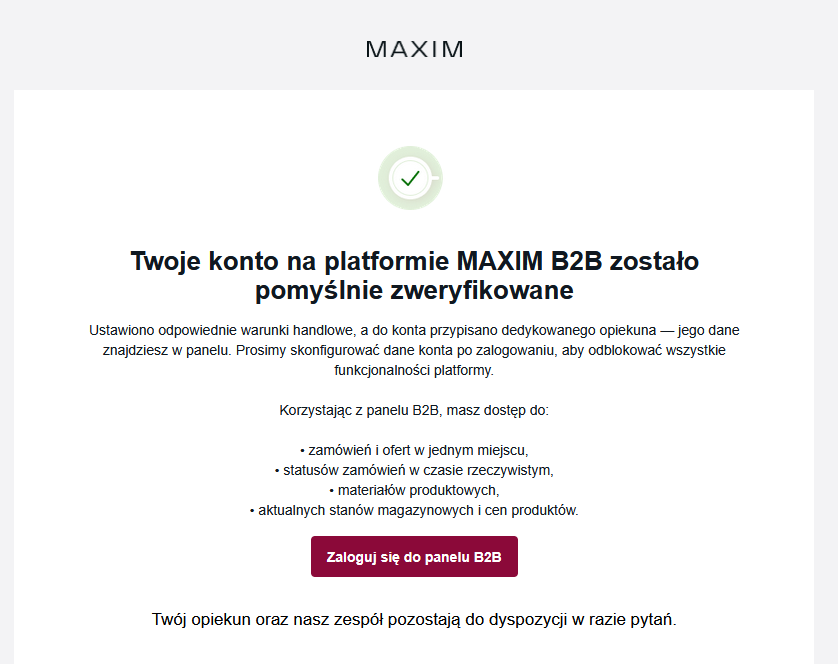
Once your account has been successfully accepted, you will receive the email below.
– – – – – – – – – – – – – – – – – – – – – – – – – – – – – – – – – – – – – – – – – – – – – – – – – – – – – – – – – – – – – –
5. Click on the link in the email and fill out the details
Clicking the “Log in to B2B panel” button will redirect you to the login page.
Enter the provided email address and password to access the platform.
– – – – – – – – – – – – – – – – – – – – – – – – – – – – – – – – – – – – – – – – – – – – – – – – – – – – – – – – – – – – – –
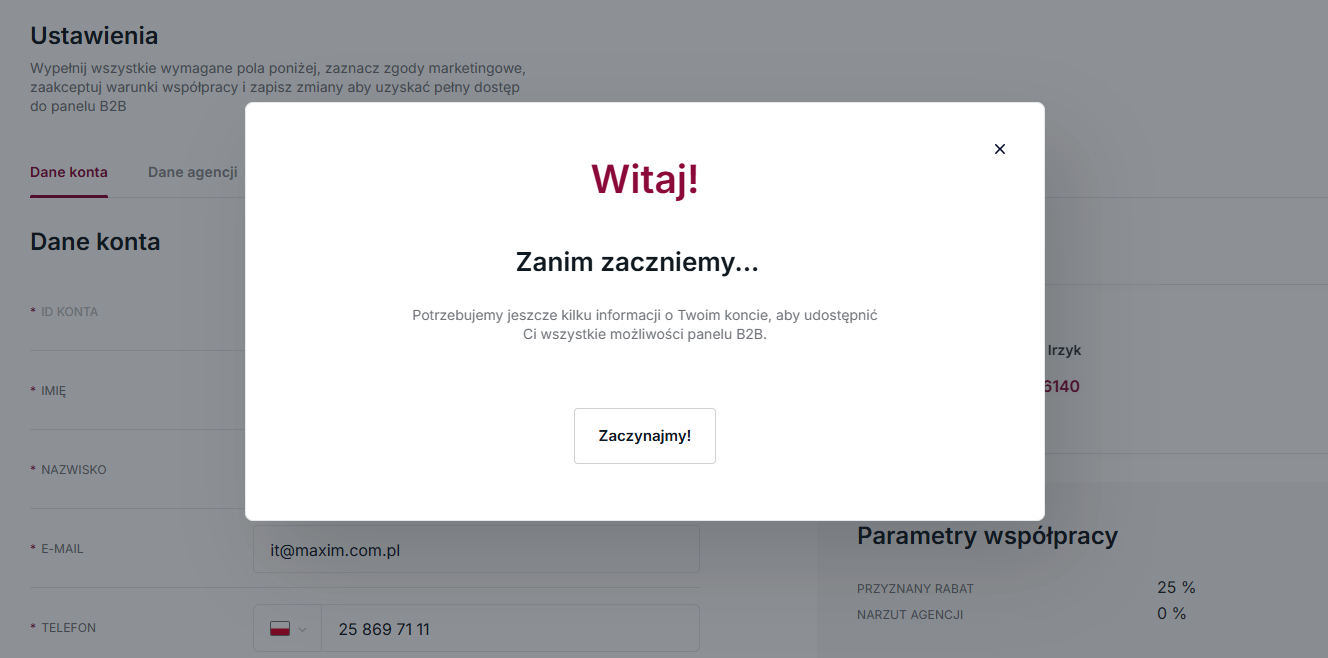
6. “Let’s get started”
By clicking the “Let’s get started” button, the system will take you to the settings view.
– – – – – – – – – – – – – – – – – – – – – – – – – – – – – – – – – – – – – – – – – – – – – – – – – – – – – – – – – – – – – –
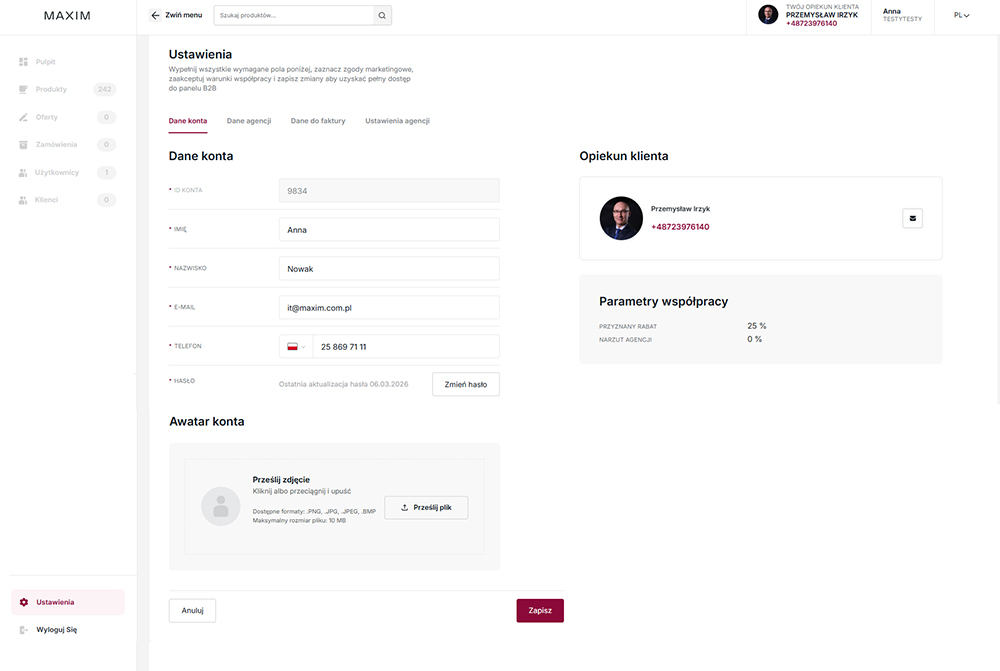
7. Access to platform functionalities
If you want to gain full access to the platform’s functionality, fill out all required data.
– – – – – – – – – – – – – – – – – – – – – – – – – – – – – – – – – – – – – – – – – – – – – – – – – – – – – – – – – – – – – –
8. Agency Data
Go to “Agency Details” to fill out the necessary fields.
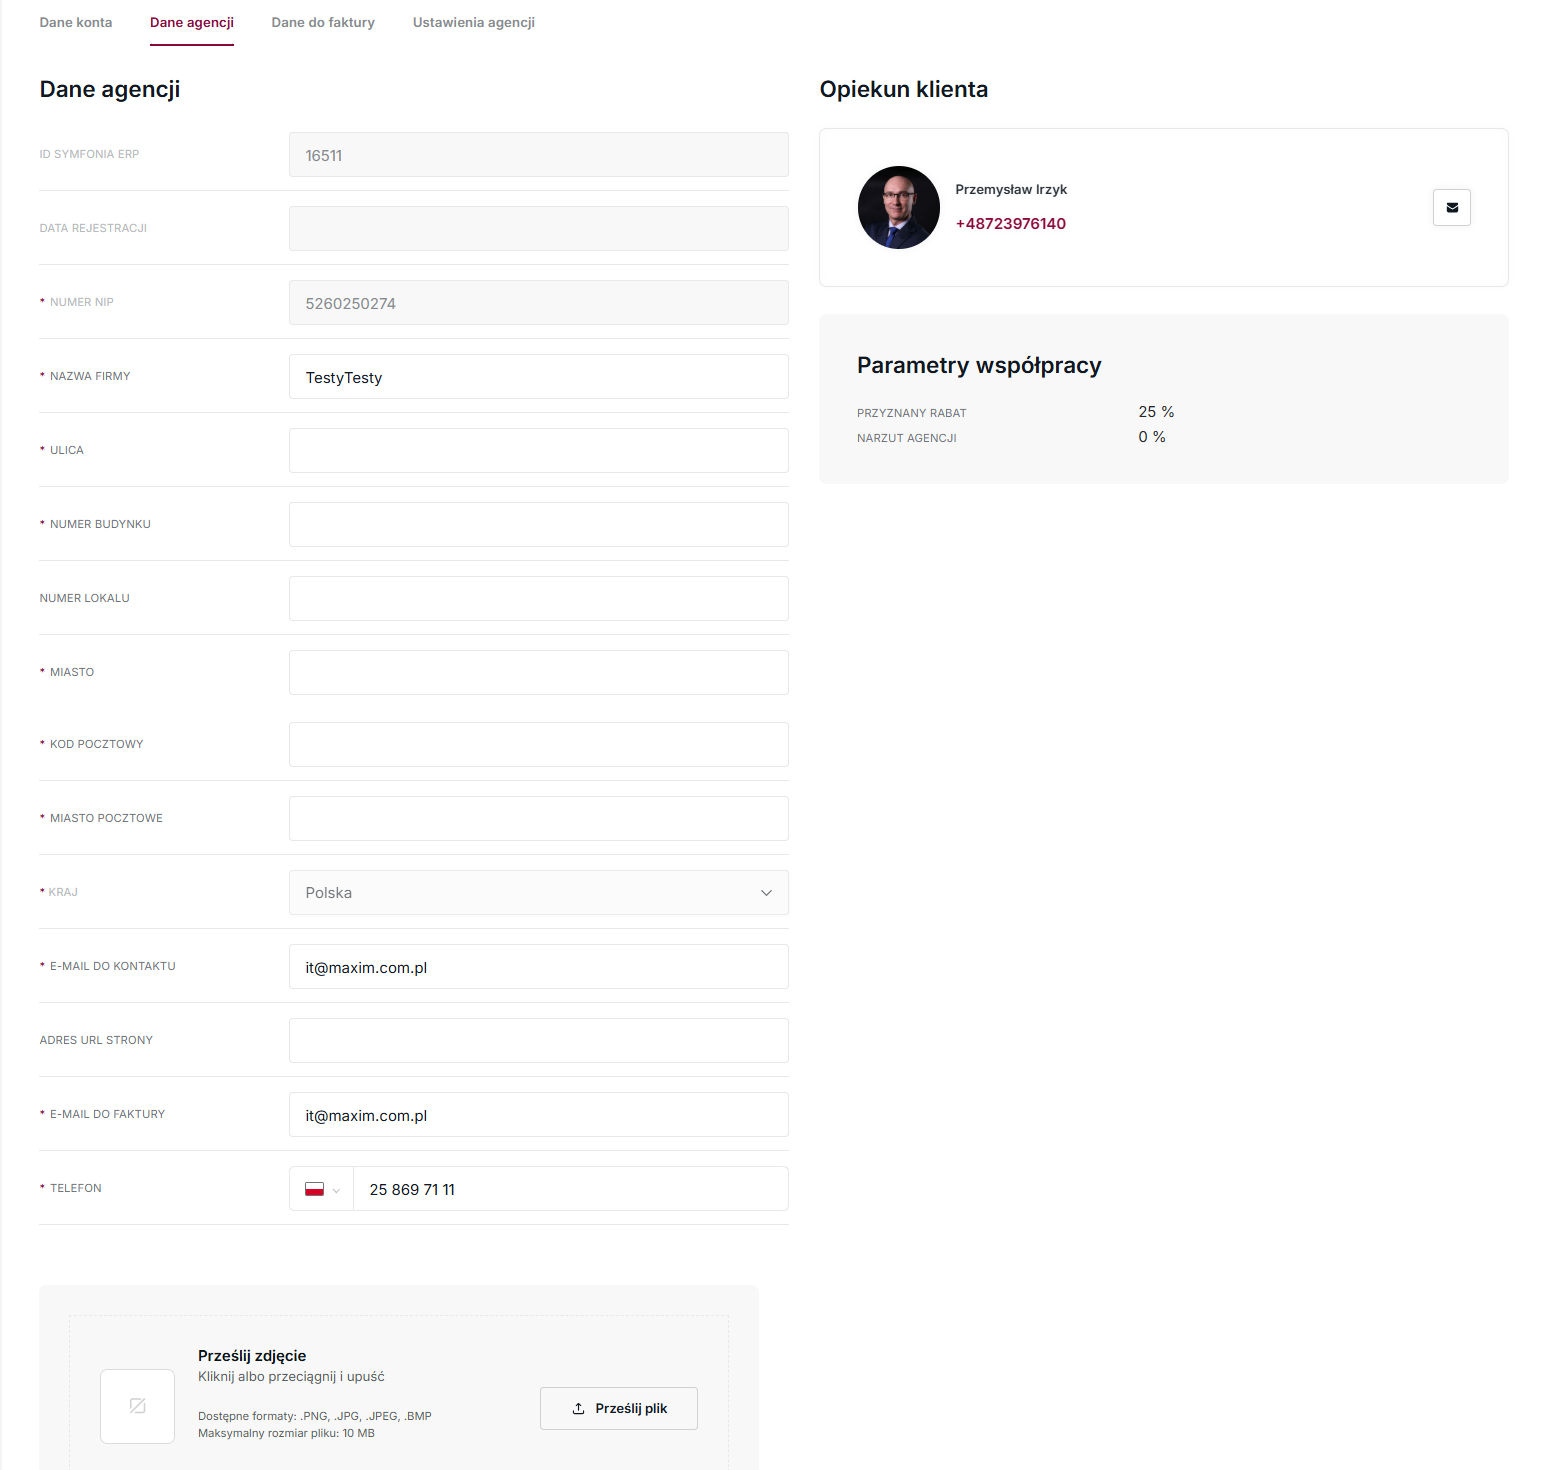
After saving the change, you will be able to access the product menu.
– – – – – – – – – – – – – – – – – – – – – – – – – – – – – – – – – – – – – – – – – – – – – – – – – – – – – – – – – – – – – –
9. Agency Settings
You can add a target markup level in your agency settings.
You can disable or change it at any time at the offer or order level.

Check the system in practice. Register your agency.*
*NOTE: Data from your existing account on legacy.maxim.com.pl will not be automatically transferred to b2b.maxim.com.pl .
By creating a new agency account, you will become its owner. If you do not hold this role within your company, please ask your manager to register you.
Stage II – materials
1. Overview of the dashboard
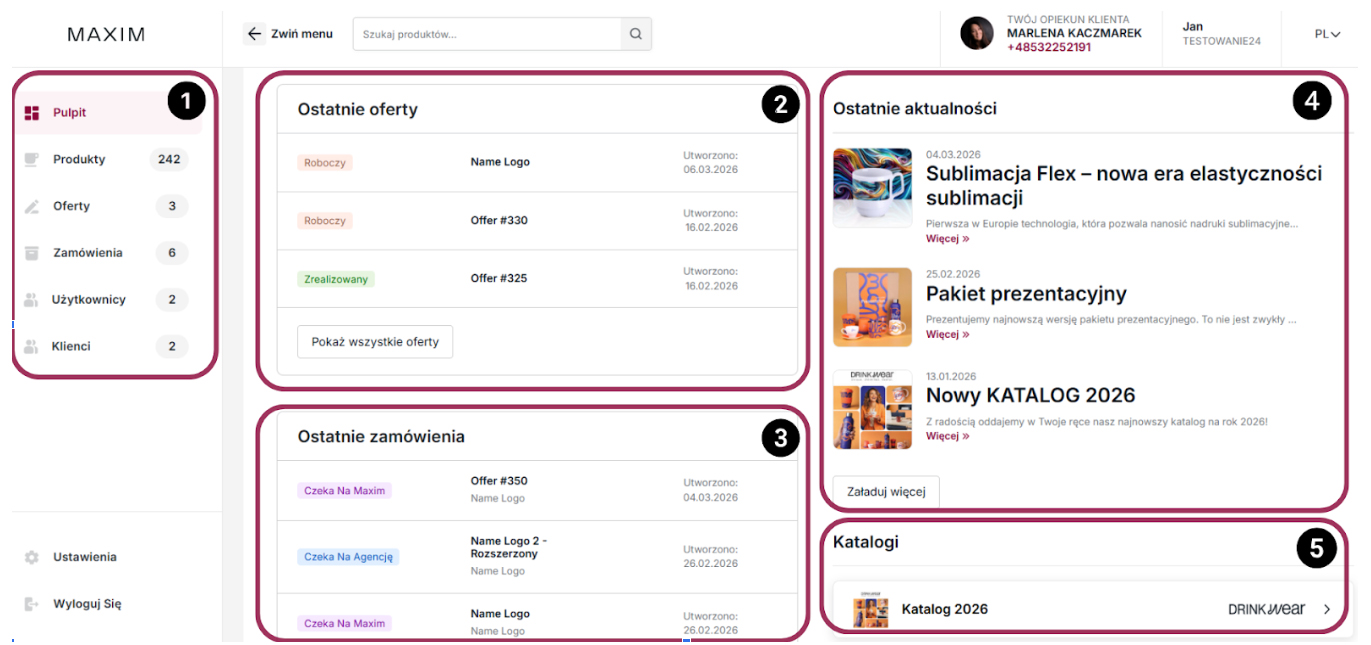
1. Navigation panel (Side menu): Allows quick access to the main system modules,
such as product catalog, offers, orders and user and customer management.
2. Latest Offers: A section displaying a list of the latest calculations along with
with their status and creation date.
3. Recent orders: Current order preview module, informing about the processing stage,
which allows you to quickly monitor progress.
4. Latest news: Information section with the latest entries regarding
technologies, products or organizational entries.
5. Catalogs: Quick access to materials for download or viewing.
– – – – – – – – – – – – – – – – – – – – – – – – – – – – – – – – – – – – – – – – – – – – – – – – – – – – – – – – – – – – – –
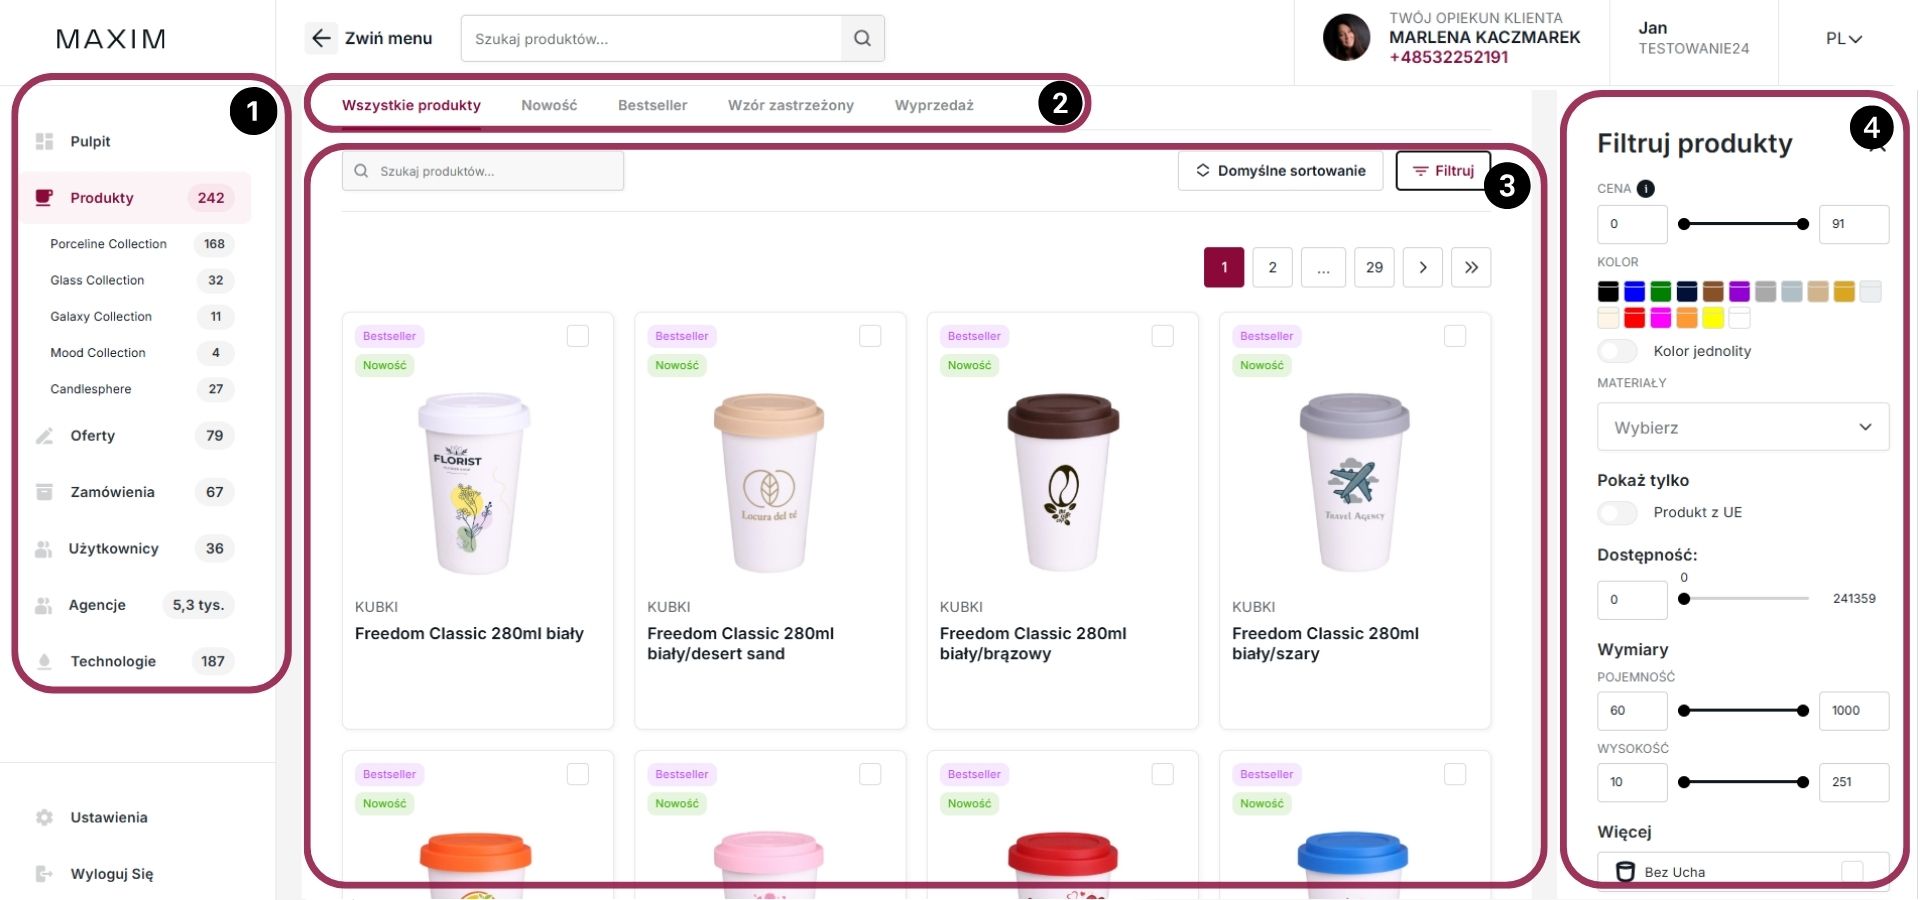
2. Product list and filters
– – – – – – – – – – – – – – – – – – – – – – – – – – – – – – – – – – – – – – – – – – – – – – – – – – – – – – – – – – – – – –
3. Product card
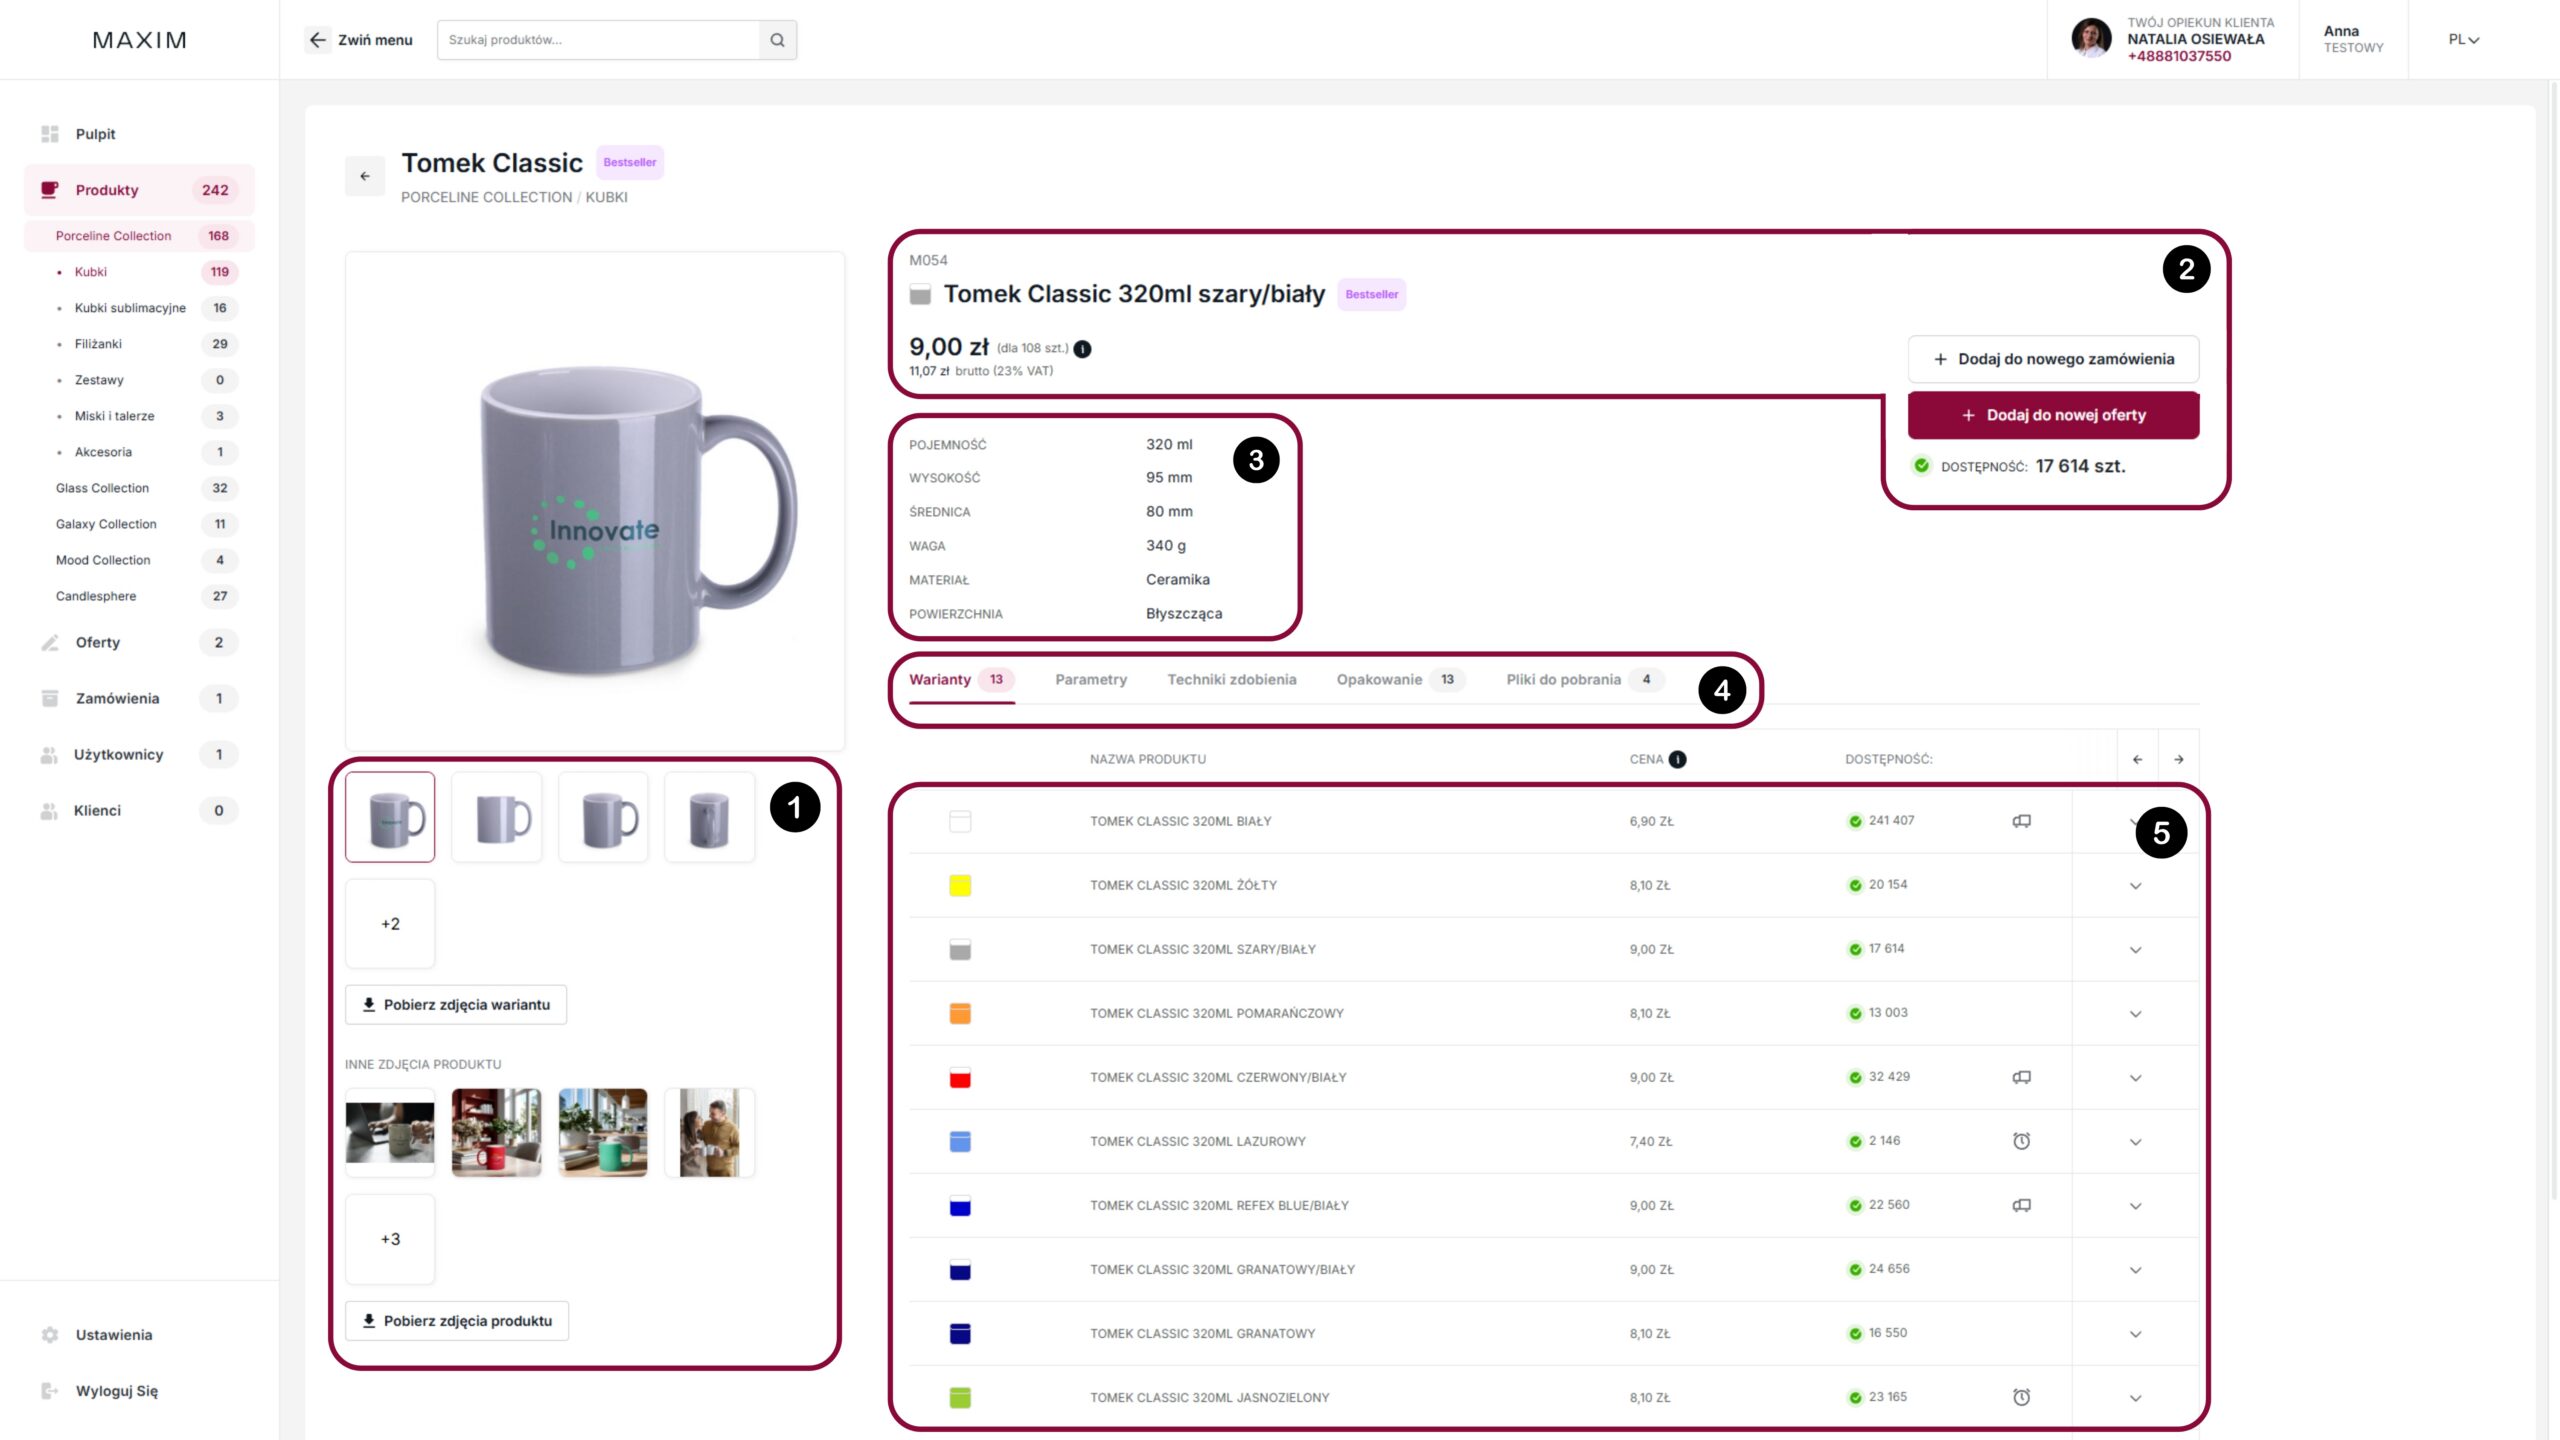
1. Visual module: On the left side there is a photo preview window with a thumbnail gallery.
The button below the photos allows you to directly download the graphic files of the selected variant.
2. Identification and Trademark Data: The top section includes the model name, product code, and market status.
Next to it you will find the current net and gross prices as well as buttons for adding items to an order or offer.
3. Technical specifications: The middle panel presents key physical parameters:
capacity (320 ml), dimensions (95×80 mm), weight and type of material and finish.
4. Functional navigation: The bookmarks bar allows you to quickly switch between
table of variants, decoration techniques, packaging logistics data and files for download.
5. Variants: The table lists all available product variants along with their prices.
individual items and current stock levels in real time.
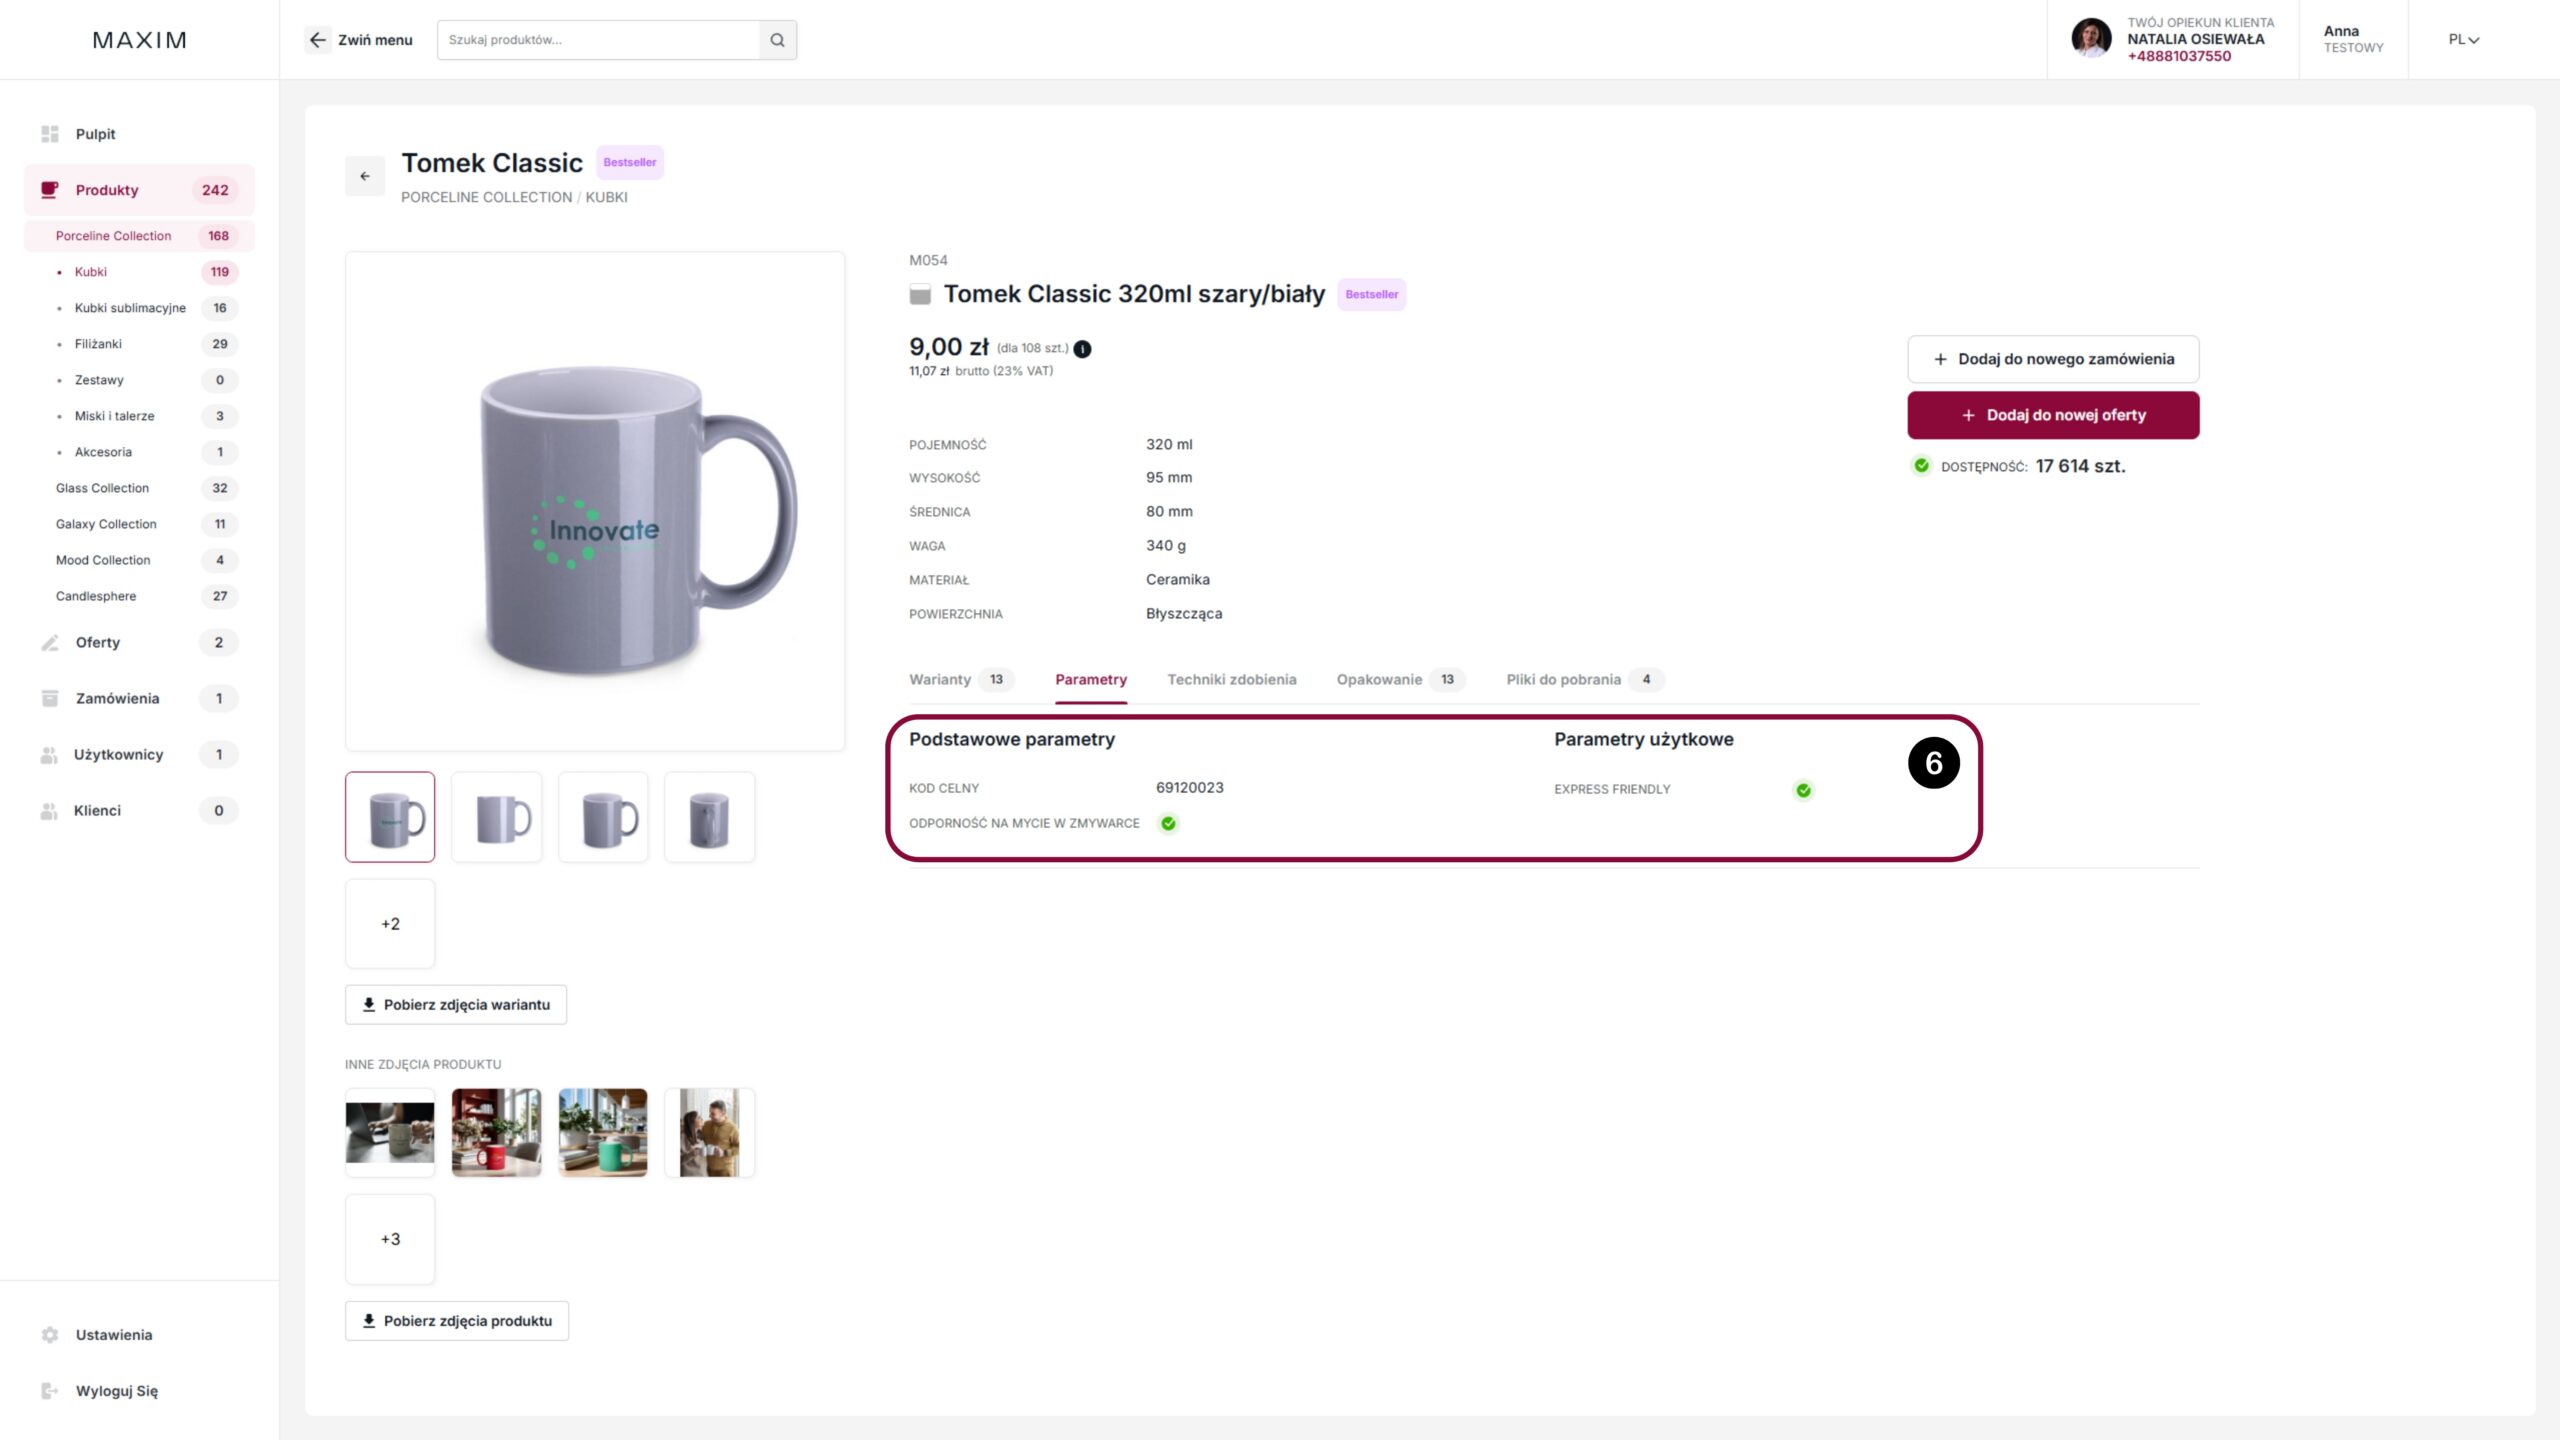
6. Parameters: Contains additional information such as customs code, product resistance
dishwasher safe and performance parameters.
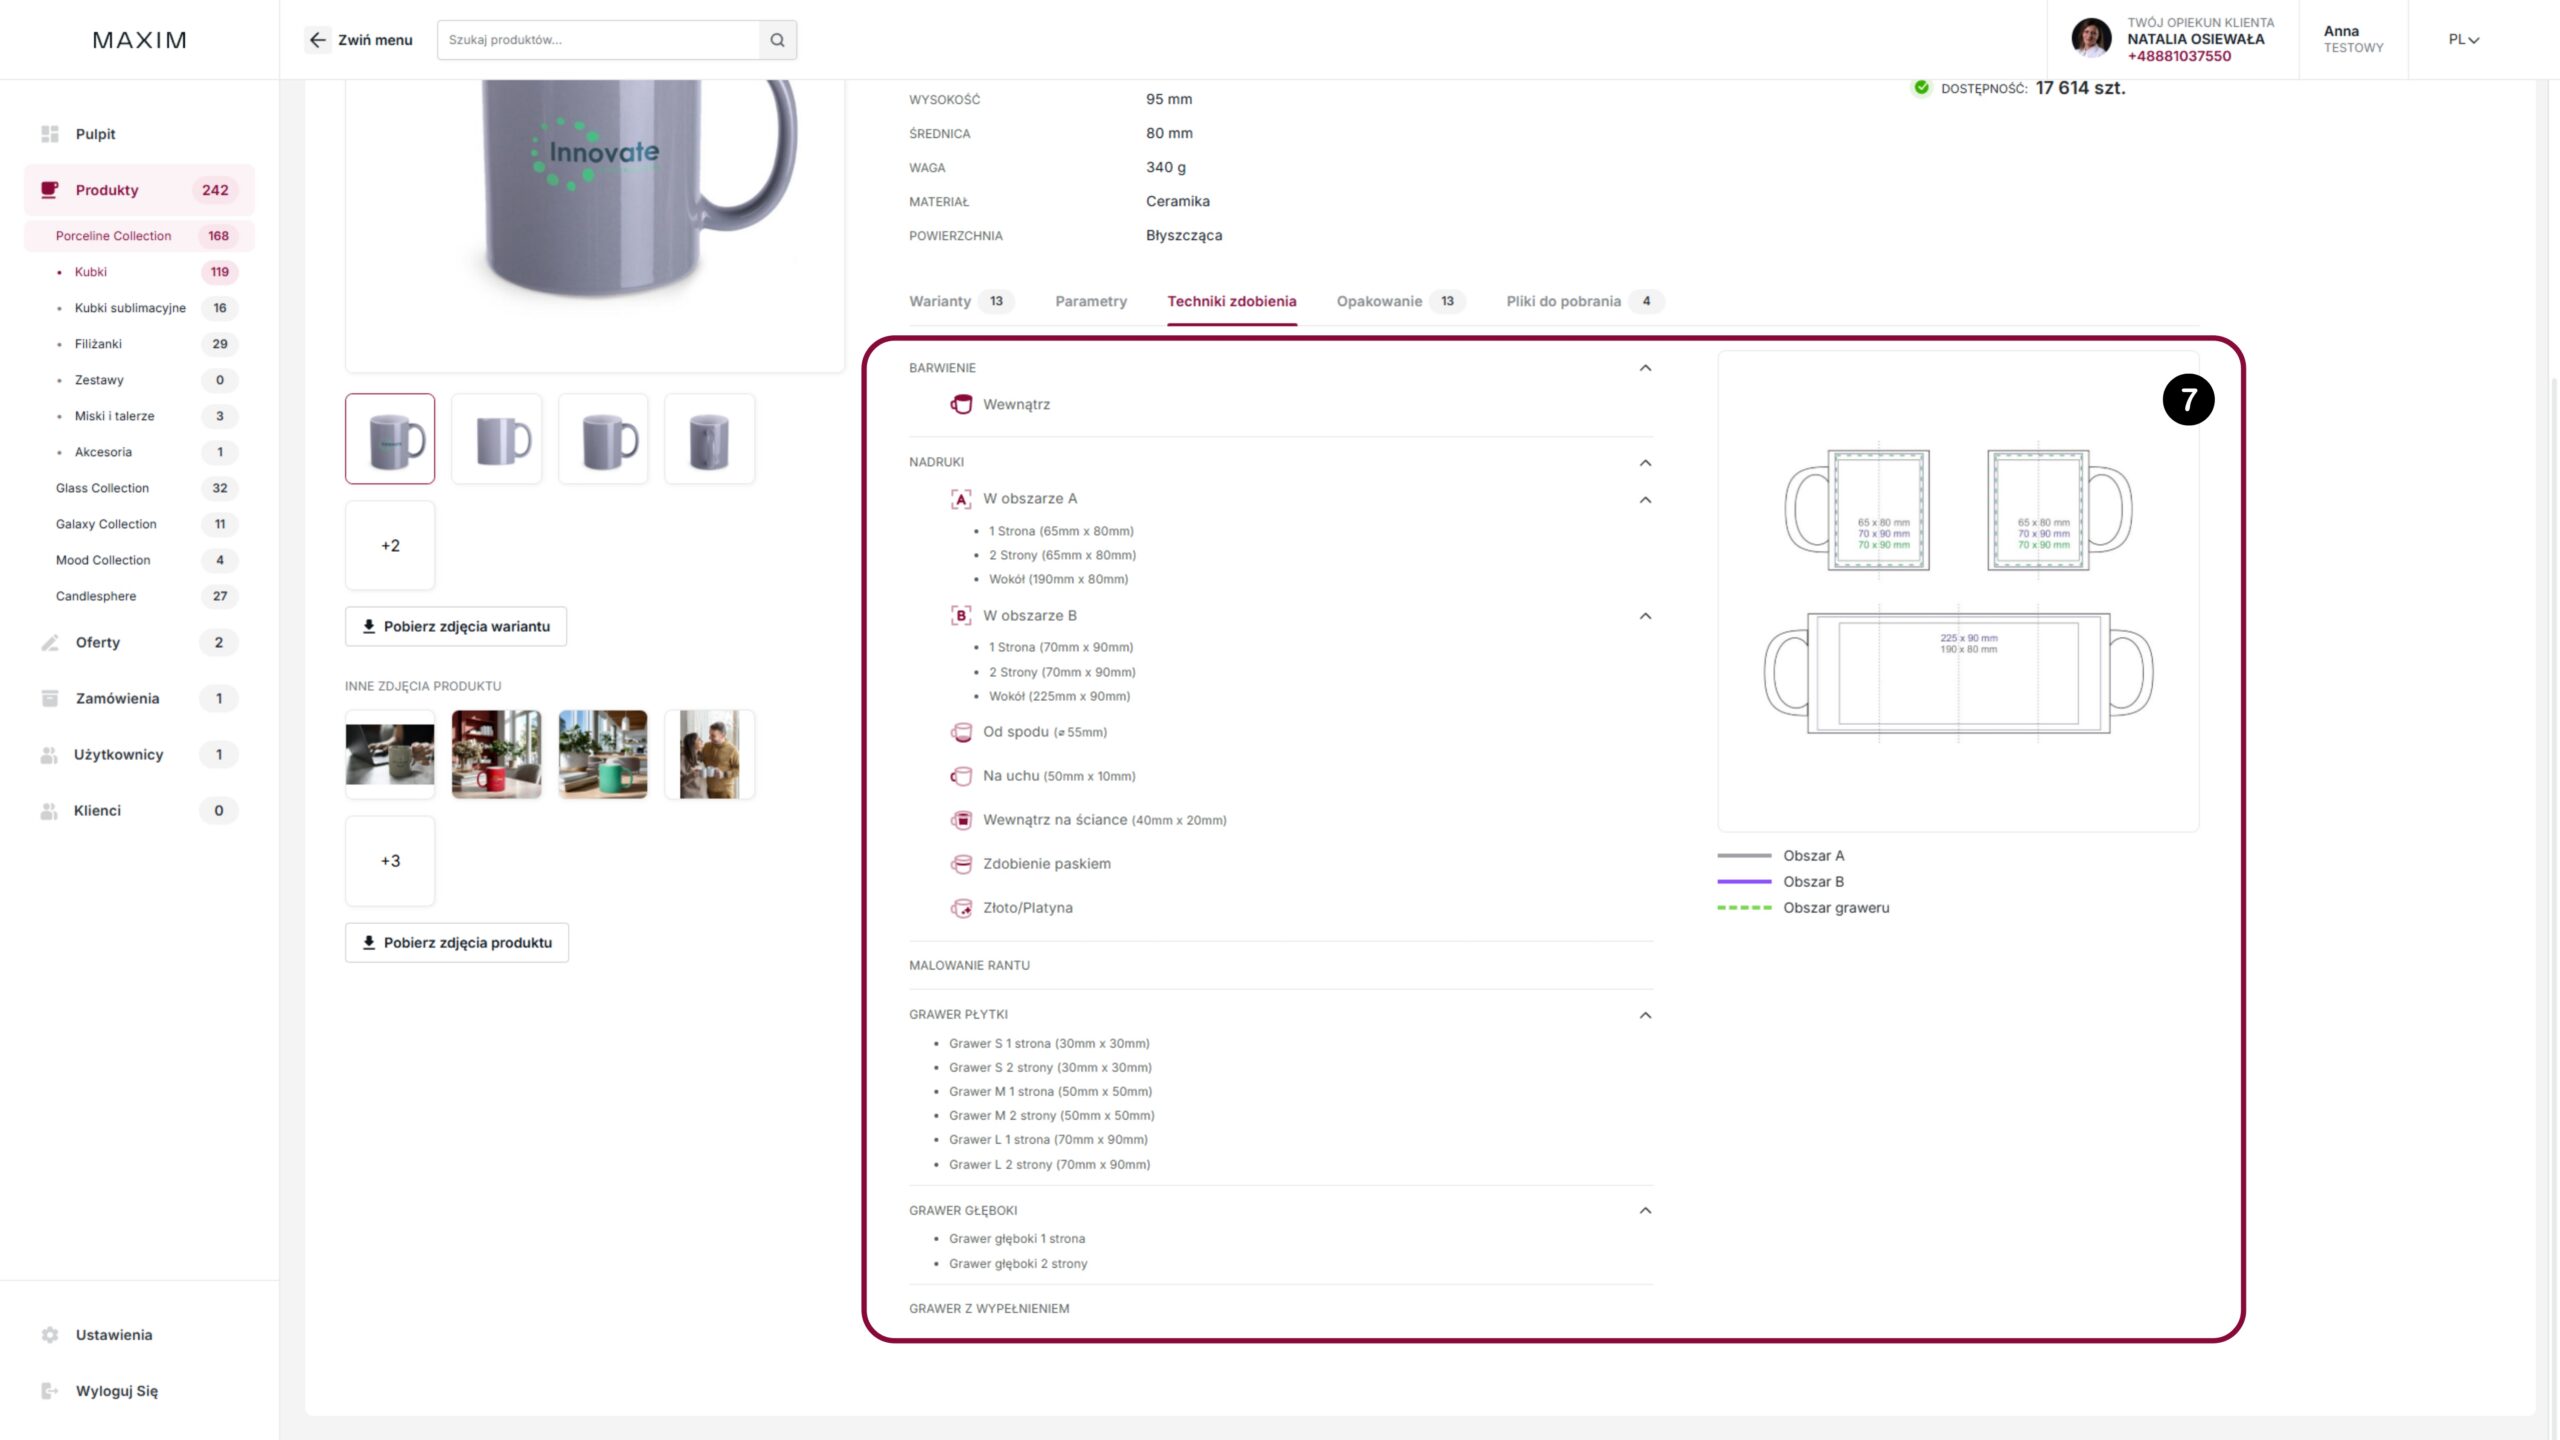
7. Decorating Techniques: This section provides a detailed list of available product decoration methods,
such as dyeing, multi-sided printing and engraving, along with the dimensions of the areas assigned to them
The whole is complemented by a graphic diagram, facilitating the preparation of the project.
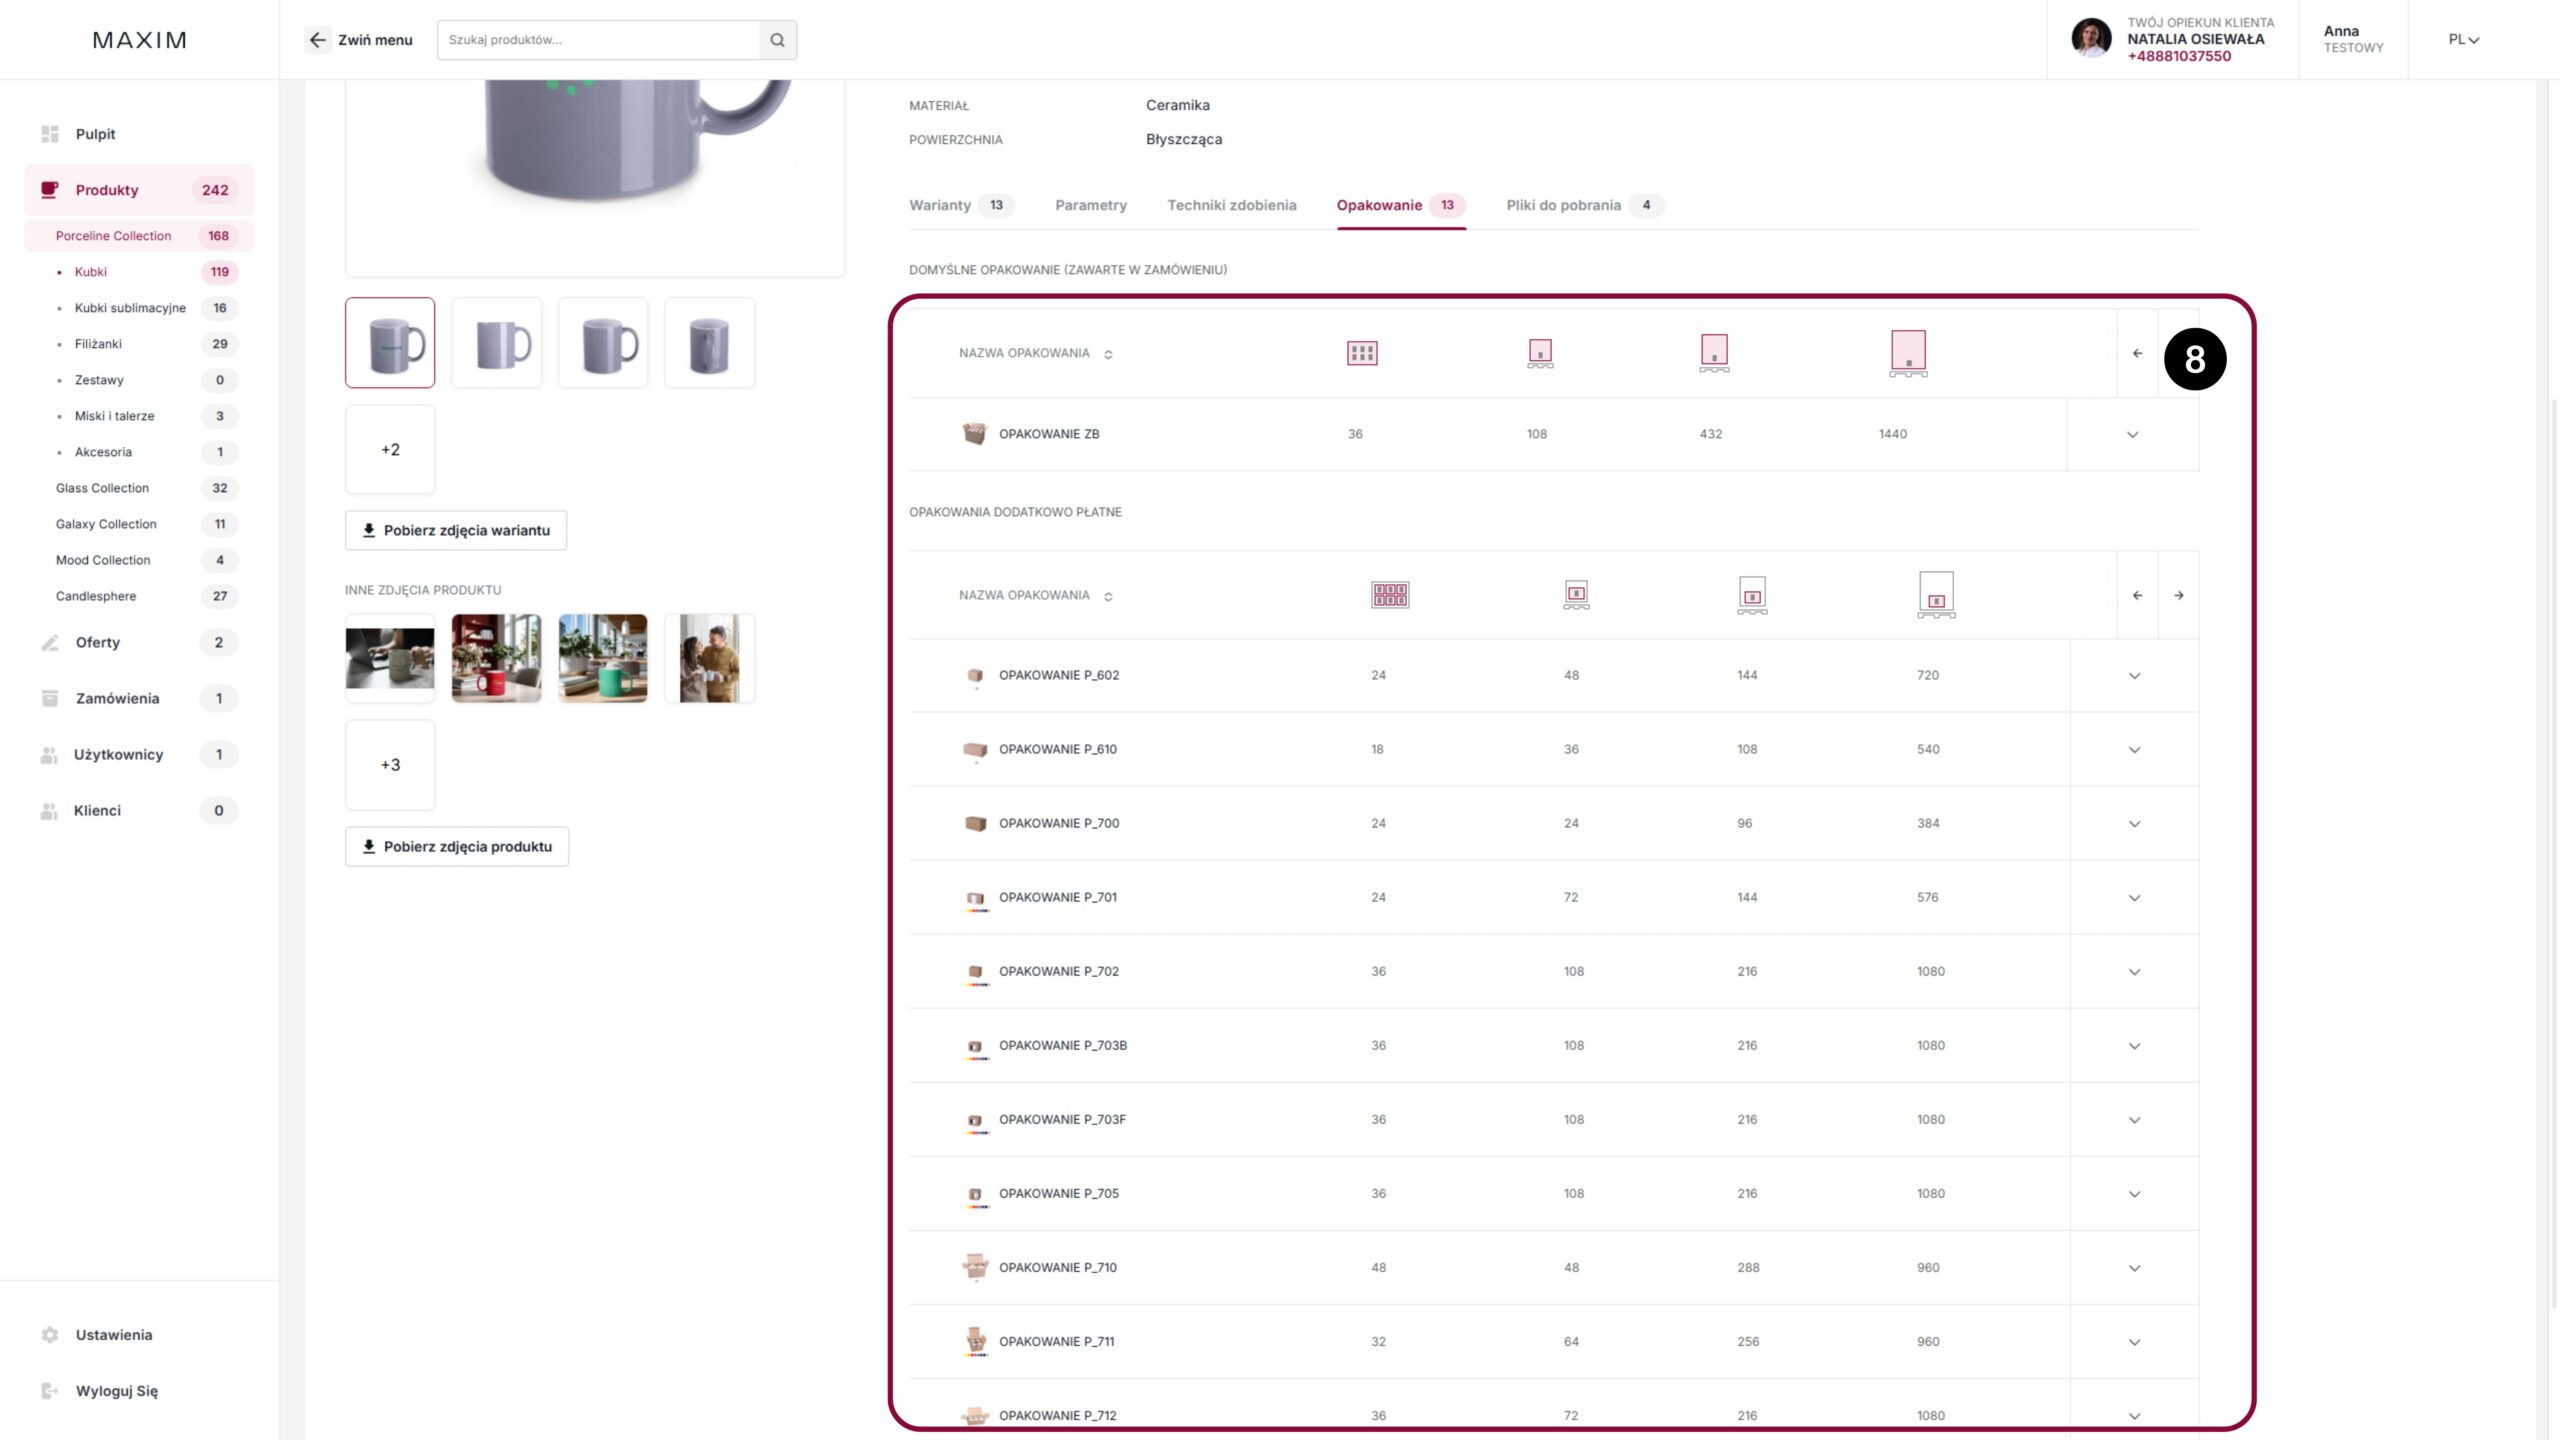
8. Packaging: This section contains a summary of the available packaging methods, divided into
for default bulk packaging and additionally paid options. The table specifies the parameters
logistics for each type of carton, specifying the number of product pieces in a single package,
layer and on the entire pallet, which allows for precise planning of transport and storage.
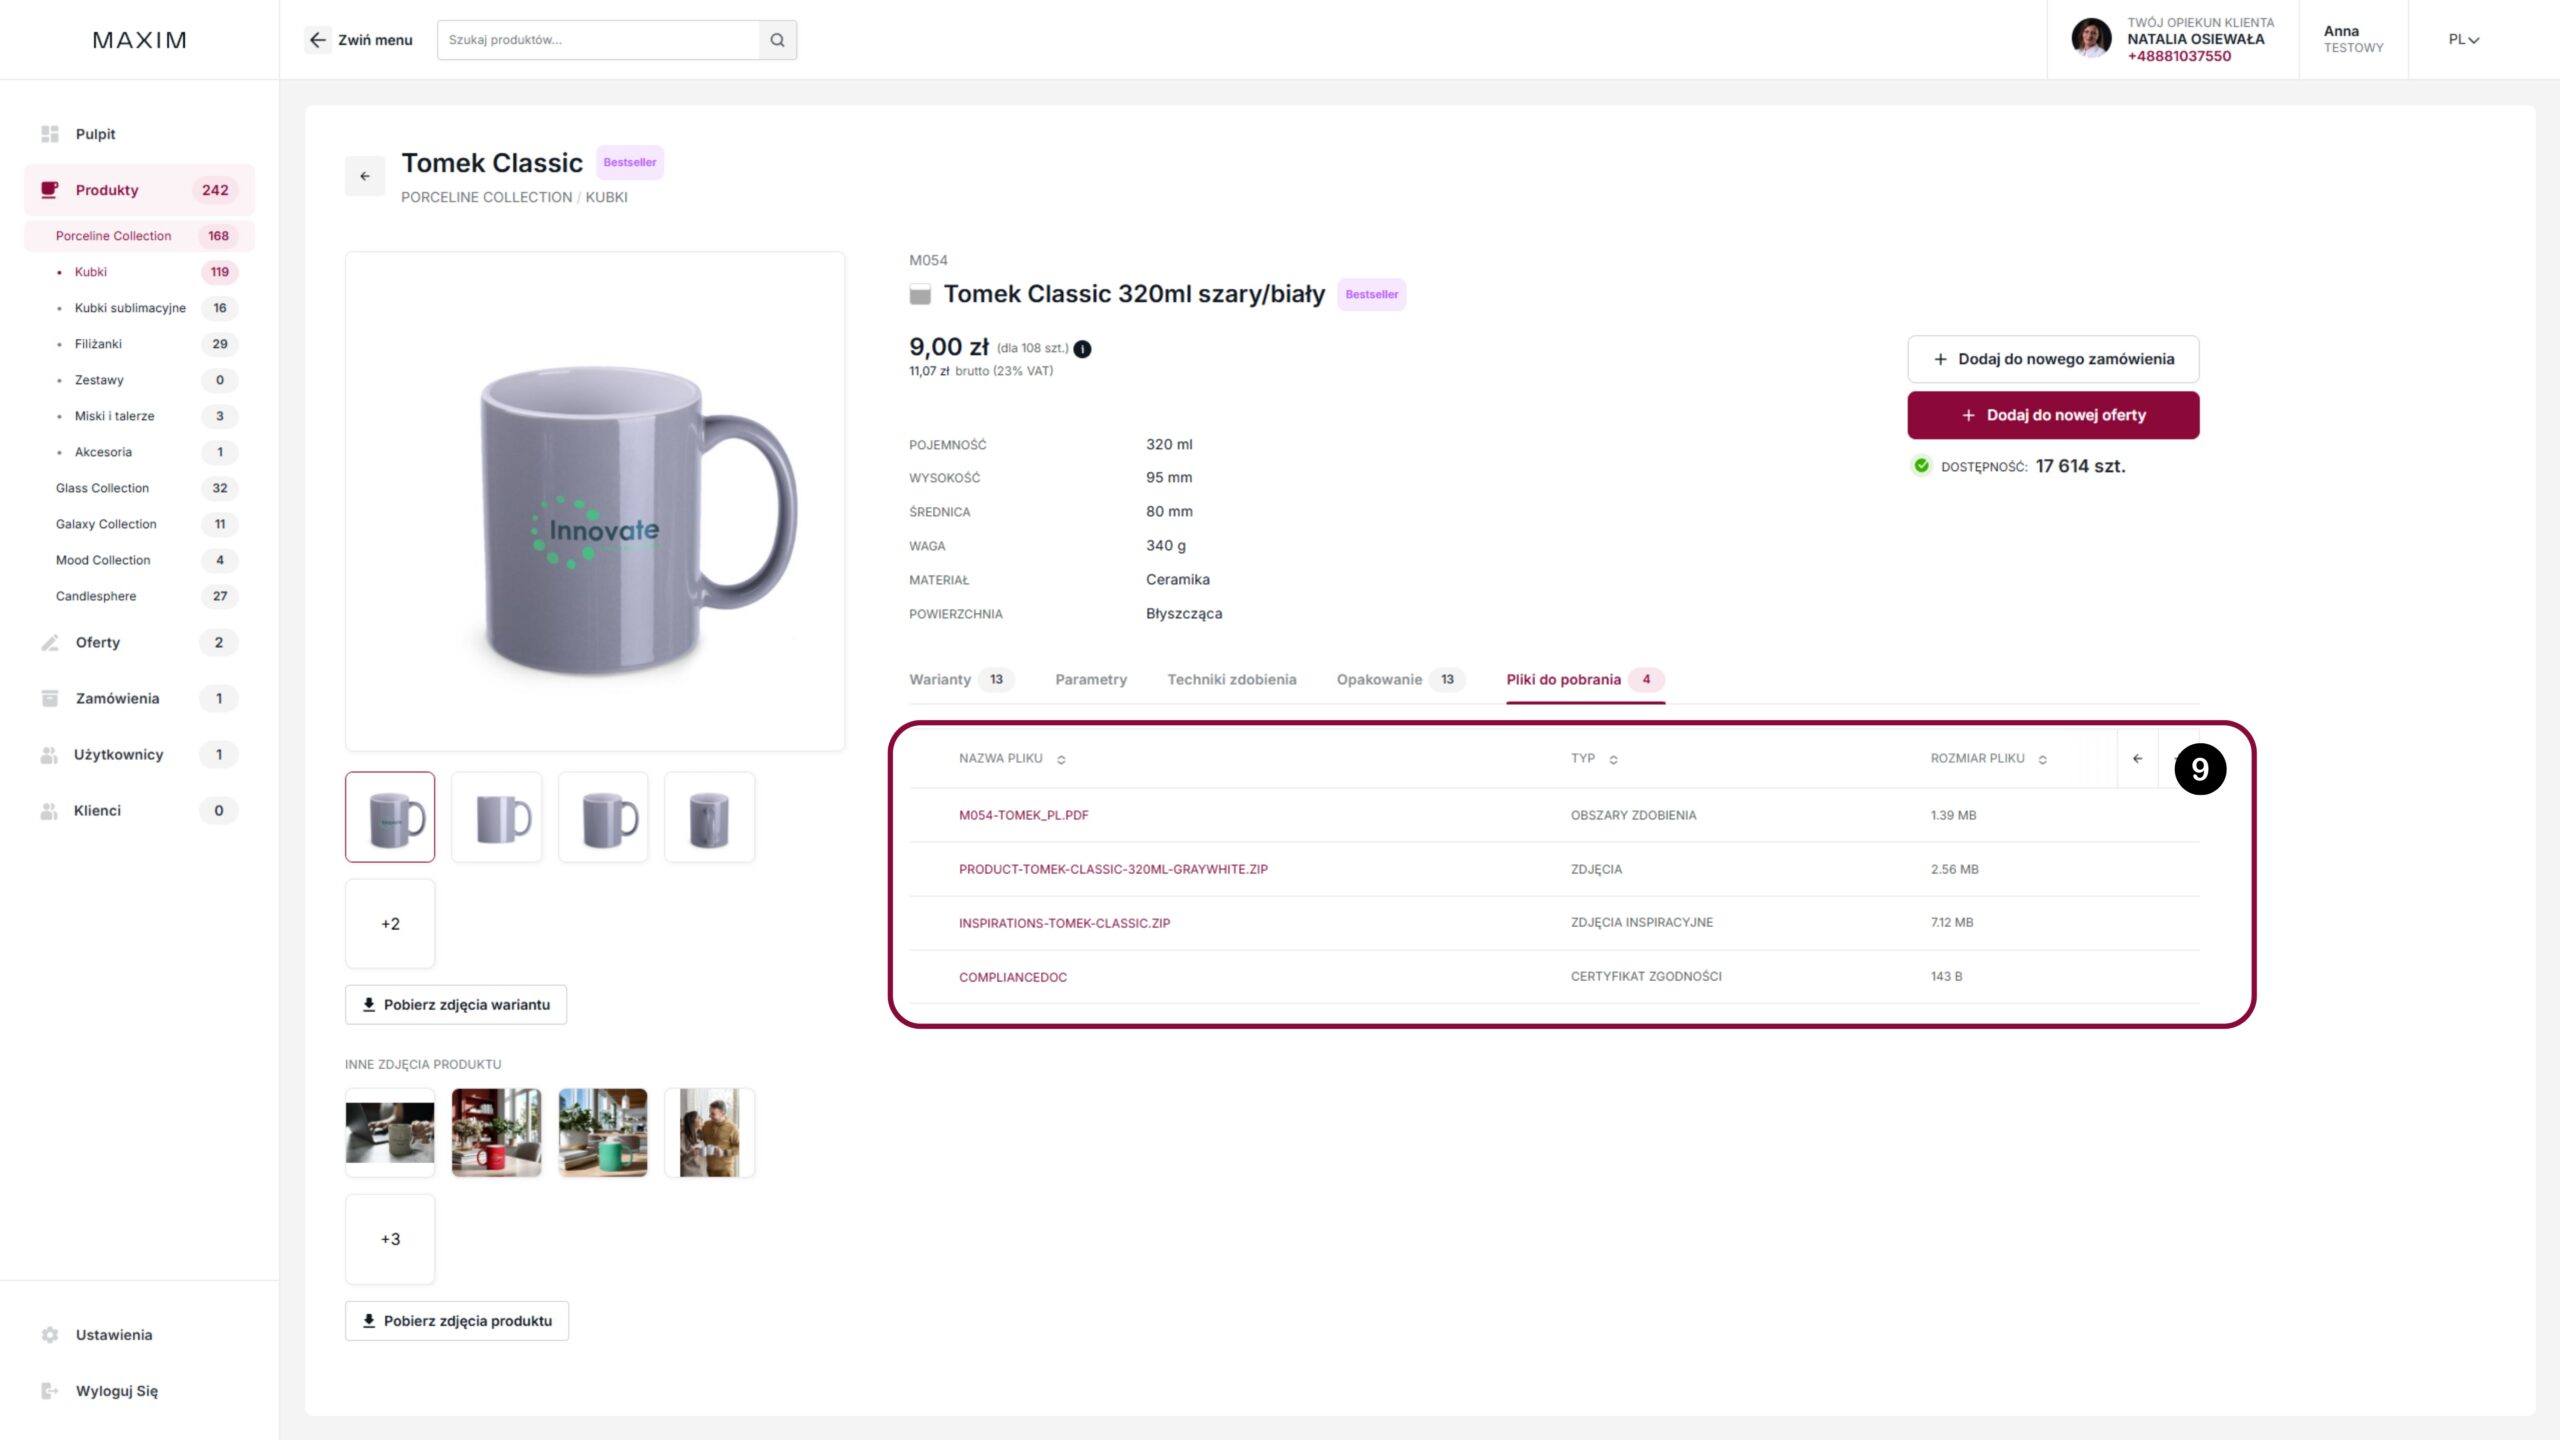
9. Files to download: A set of tools to help you process your order
and preparation of the graphic design, can be found in the last tab – ‘Files to download’.
Files from the “decoration areas” segment may be particularly helpful.
and “certificate of conformity”.
– – – – – – – – – – – – – – – – – – – – – – – – – – – – – – – – – – – – – – – – – – – – – – – – – – – – – – – – – – – – – –
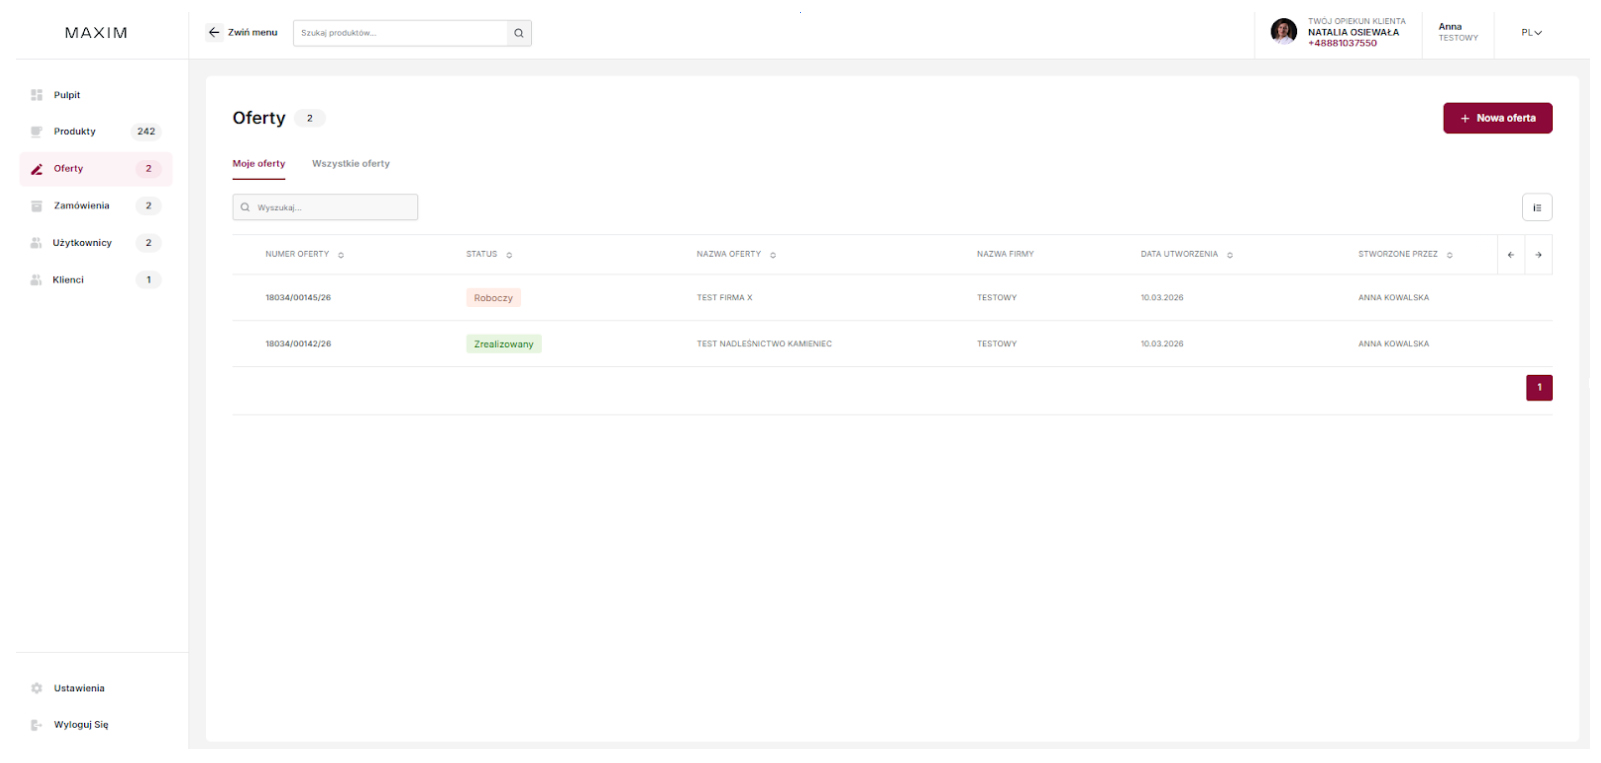
4. Offer + offer statuses
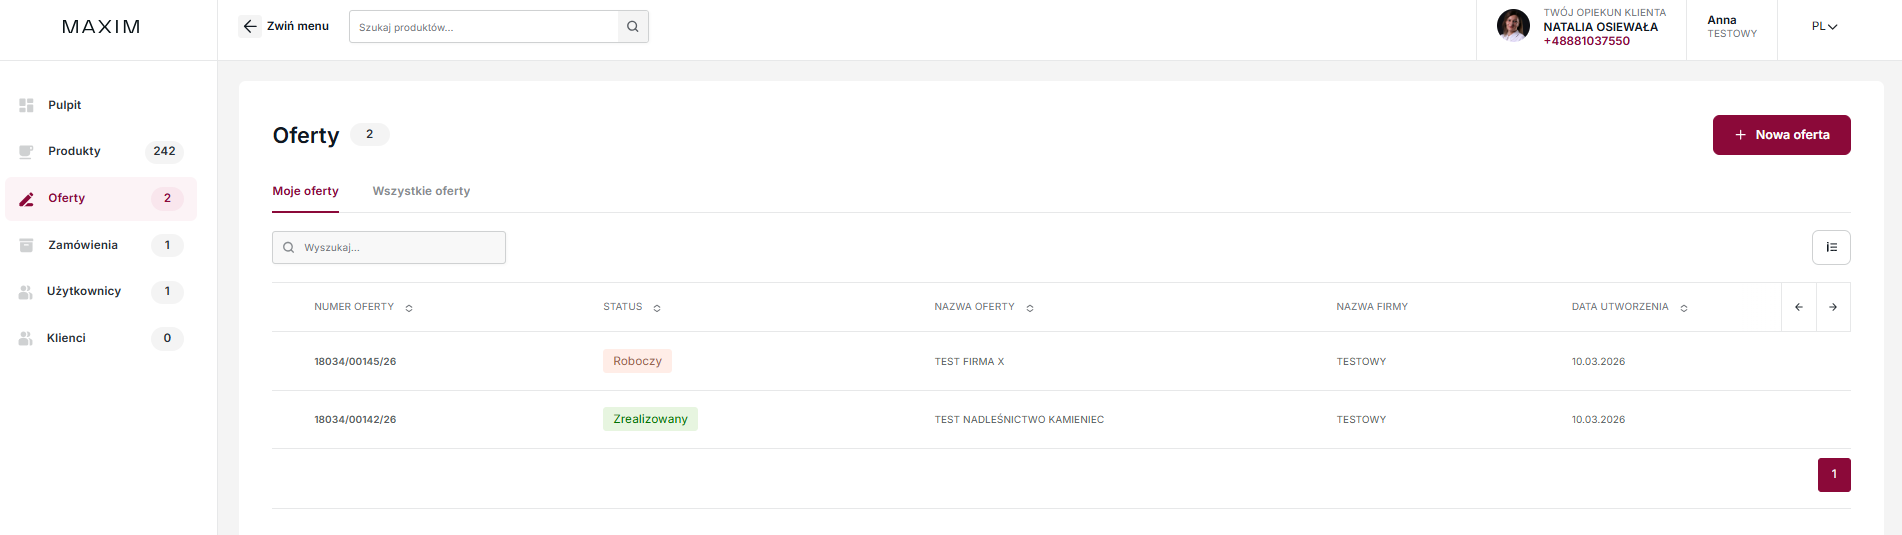
This view is a central register of offers, divided into the “My offers” and “All offers” tabs.
The table allows you to monitor sales processes by viewing statuses and assigning
to specific contractors and the creation date. From this panel, the user can use
from the document search engine and initiate the process of creating a new quote with the “New offer” button.
Status Indications:
WORKING – offer in the process of configuration with full editing capabilities
COMPLETED – offer generated in the order – no editing possible.
– – – – – – – – – – – – – – – – – – – – – – – – – – – – – – – – – – – – – – – – – – – – – – – – – – – – – – – – – – – – – –
5. Order + order statuses
This view is used to manage the agency’s purchasing process, divided into “My Orders”
and “All Orders”. The table provides complete operational data, enabling
tracking order status, verifying shipping dates and identifying the carrier.
The panel also aggregates information on the financial value of orders (“Order total” column)
and indicates the employee responsible for their creation. From this level
module, the user can efficiently filter the purchase history using
search engine or initiate a new order using the “New order” button.
ORDER STATUS
1. Draft – The order is being edited by the Agency. At this stage you can
you can still freely change products, quantities or shipping details. The order does not
is still visible to Maxim’s fulfillment department. It has not been commissioned for production.
2. Waiting for Maxim – The order has been sent to the manufacturer’s system.
Currently undergoing trade verification. Status is automatically assigned.
after entering the necessary order data and confirming the shipping details.
3. Waiting for Agency – This status appears when there are some new items on the Maxim website.
questions or your approval is required (e.g. approval of a revised
graphic design).
4. In progress – All formalities have been completed and the order has been placed
production line. At this stage, changes to the order are no longer possible.
5. Partially Shipped – Used for orders with split shipping.
The status reflects that part of the quantity has been shipped.
6. Shipped – The order has been fully completed and handed over to the carrier.
– – – – – – – – – – – – – – – – – – – – – – – – – – – – – – – – – – – – – – – – – – – – – – – – – – – – – – – – – – – – – –
6. Users
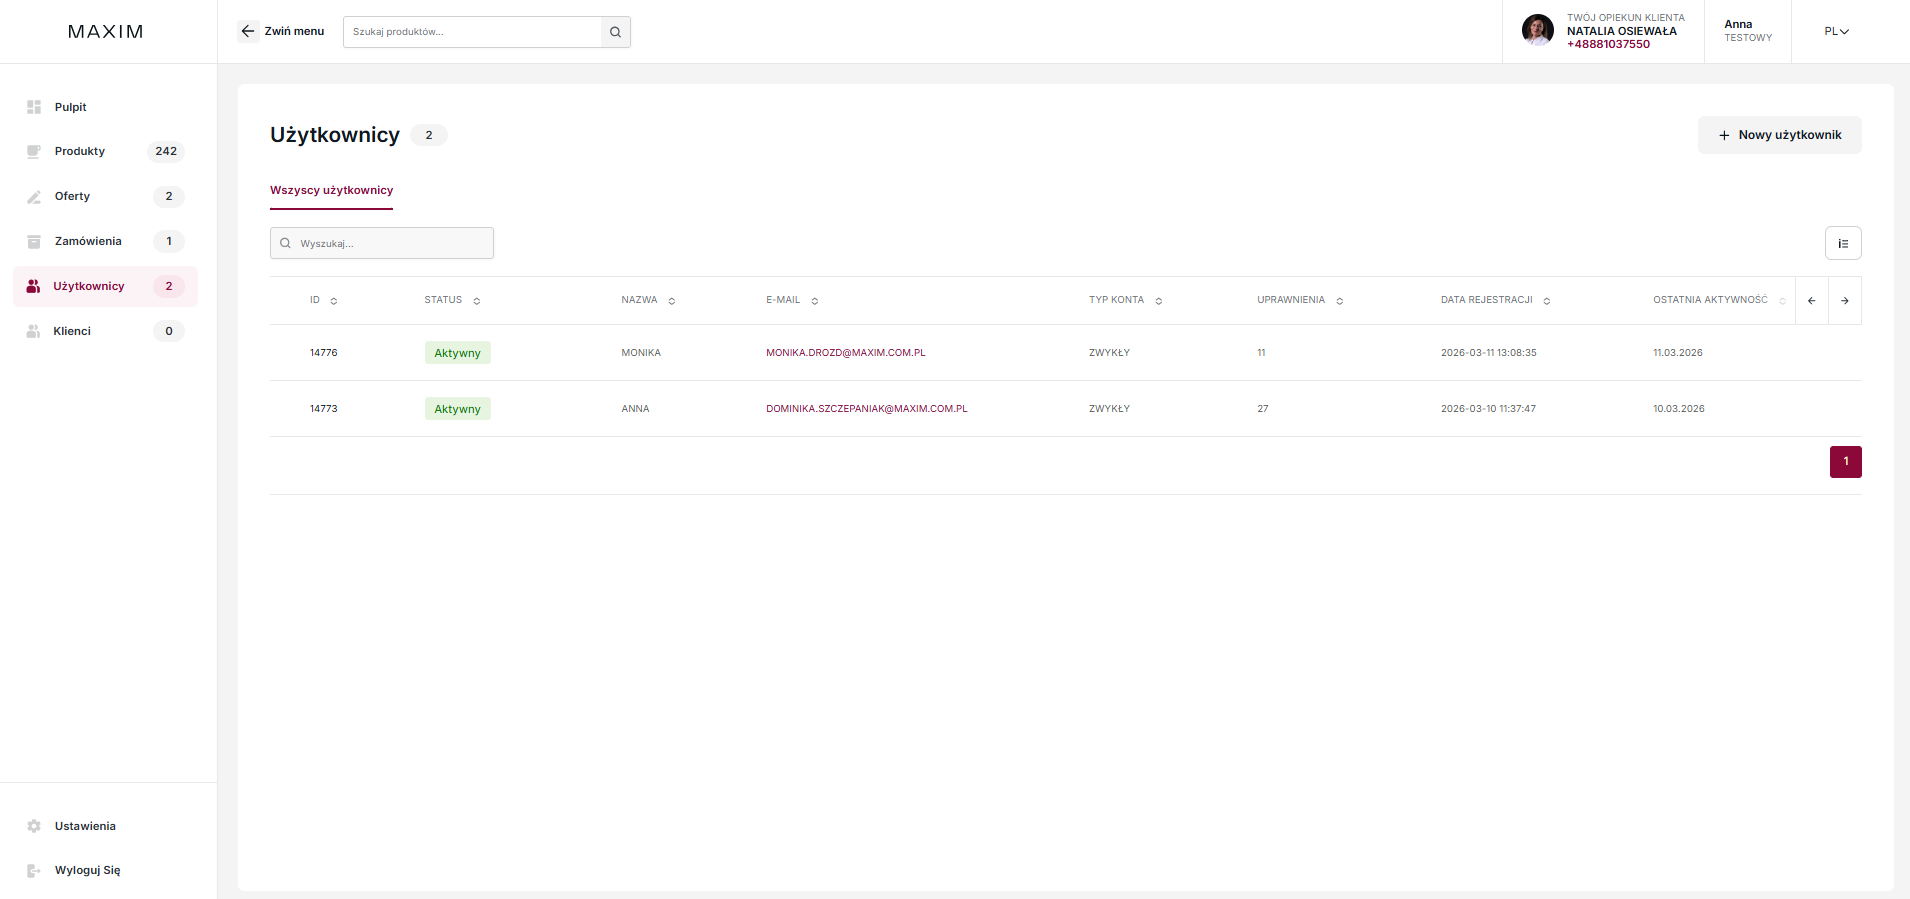
The table displays key identifying information such as ID, name, email address, and assigned account type.
and level of authorization. The system allows for ongoing monitoring of activity status (e.g. “Active”), verification
registration date and last login. Panel functionality includes a text search engine
for quick filtering of records and a “New user” button, allowing manual
adding another profile to the structure.
Adding a new user
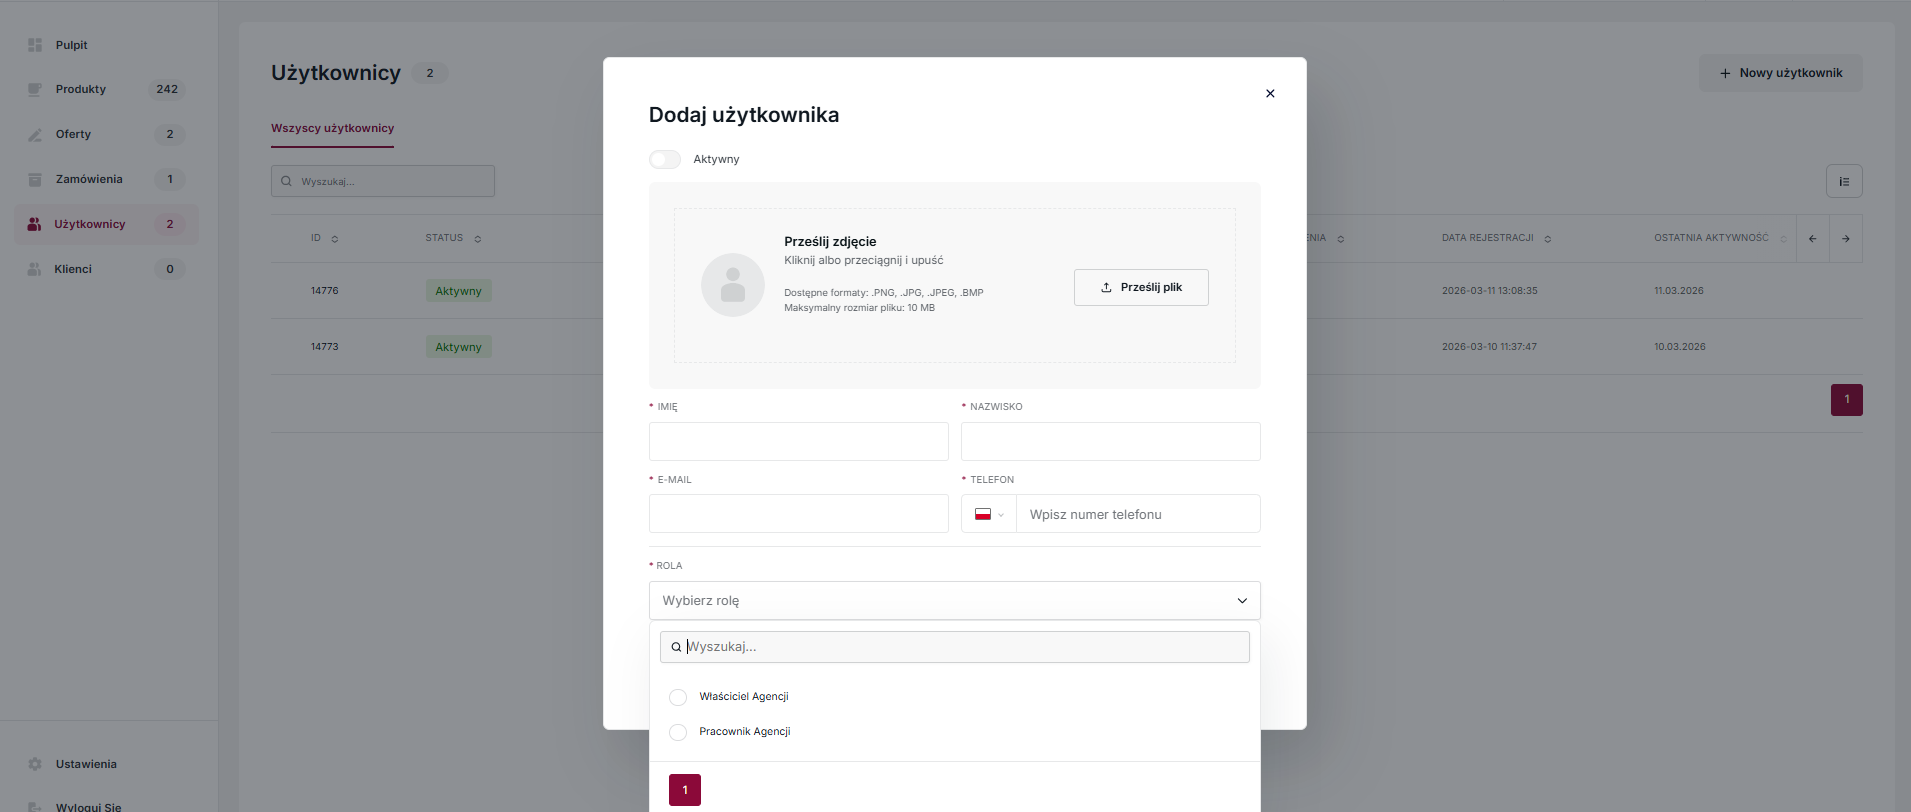
This view is used to introduce new people to the platform.
The form requires the following parameters to be defined:
1. Status and Visual Identity: The “Active” switch determines whether the account will be
ready to use immediately after creation.
The “Upload a photo” section allows you to personalize your profile
(supported formats: PNG, JPG, JPEG, BMP up to 10 MB).
This is not a mandatory step.
2. Contact Details: Required fields (marked with an asterisk) include name,
name and e-mail address that serves as login.
Additionally, the system allows you to enter a telephone number
with selection of country code.
3. Permission Configuration (Role): A key element of the process in which the administrator
using the drop-down list, assigns the new person to one of two roles:
“Agency Owner” (full supervision over the structure) or “Agency Employee”
(operational access to your own offers)
User Edit
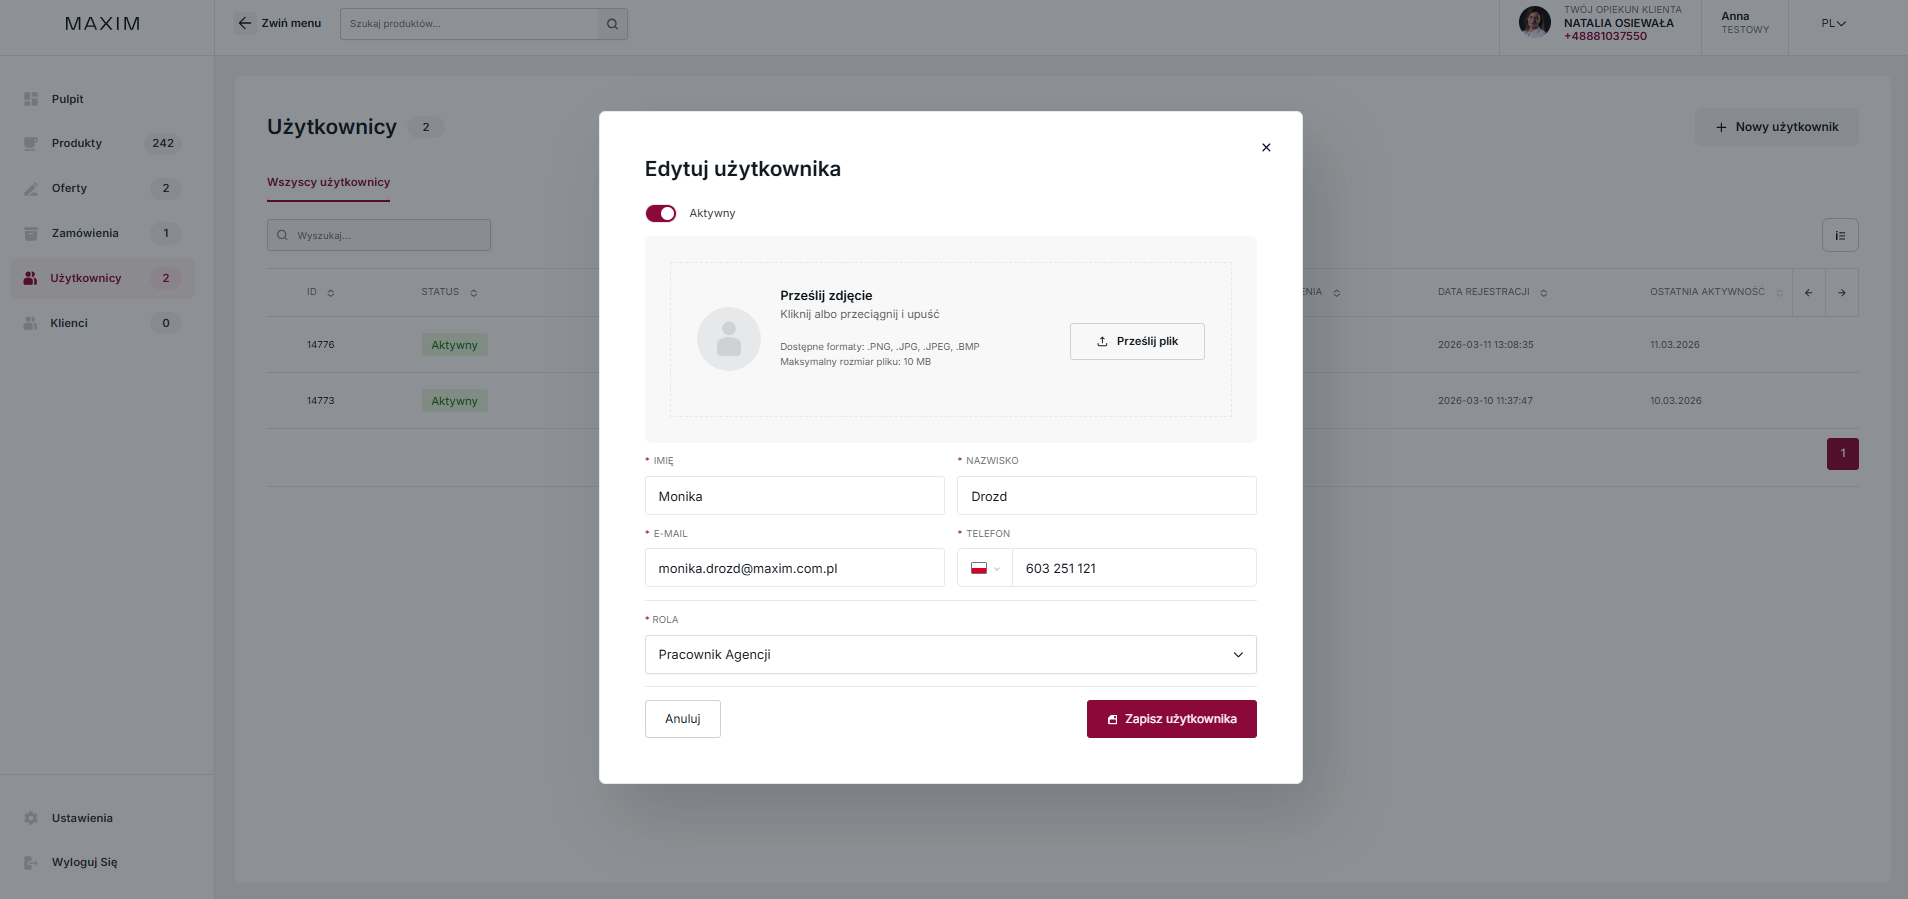
This view allows you to quickly update data without leaving the main panel. The module allows you to:
1. Access Management (Status): The “Active” switch at the top allows
to immediately block or restore the user’s ability to log into the system.
2. Updating personal data: Edit fields allow you to correct contact details (e-mail, phone number)
and uploading or changing your profile photo using the drag and drop method.
3. Modify hierarchy (Role): The drop-down list allows you to change the assigned role
between the “Employee” and the “Agency Owner”, which directly affects the scope
permissions (e.g. viewing offers from other users).
– – – – – – – – – – – – – – – – – – – – – – – – – – – – – – – – – – – – – – – – – – – – – – – – – – – – – – – – – – – – – –
7. Customers
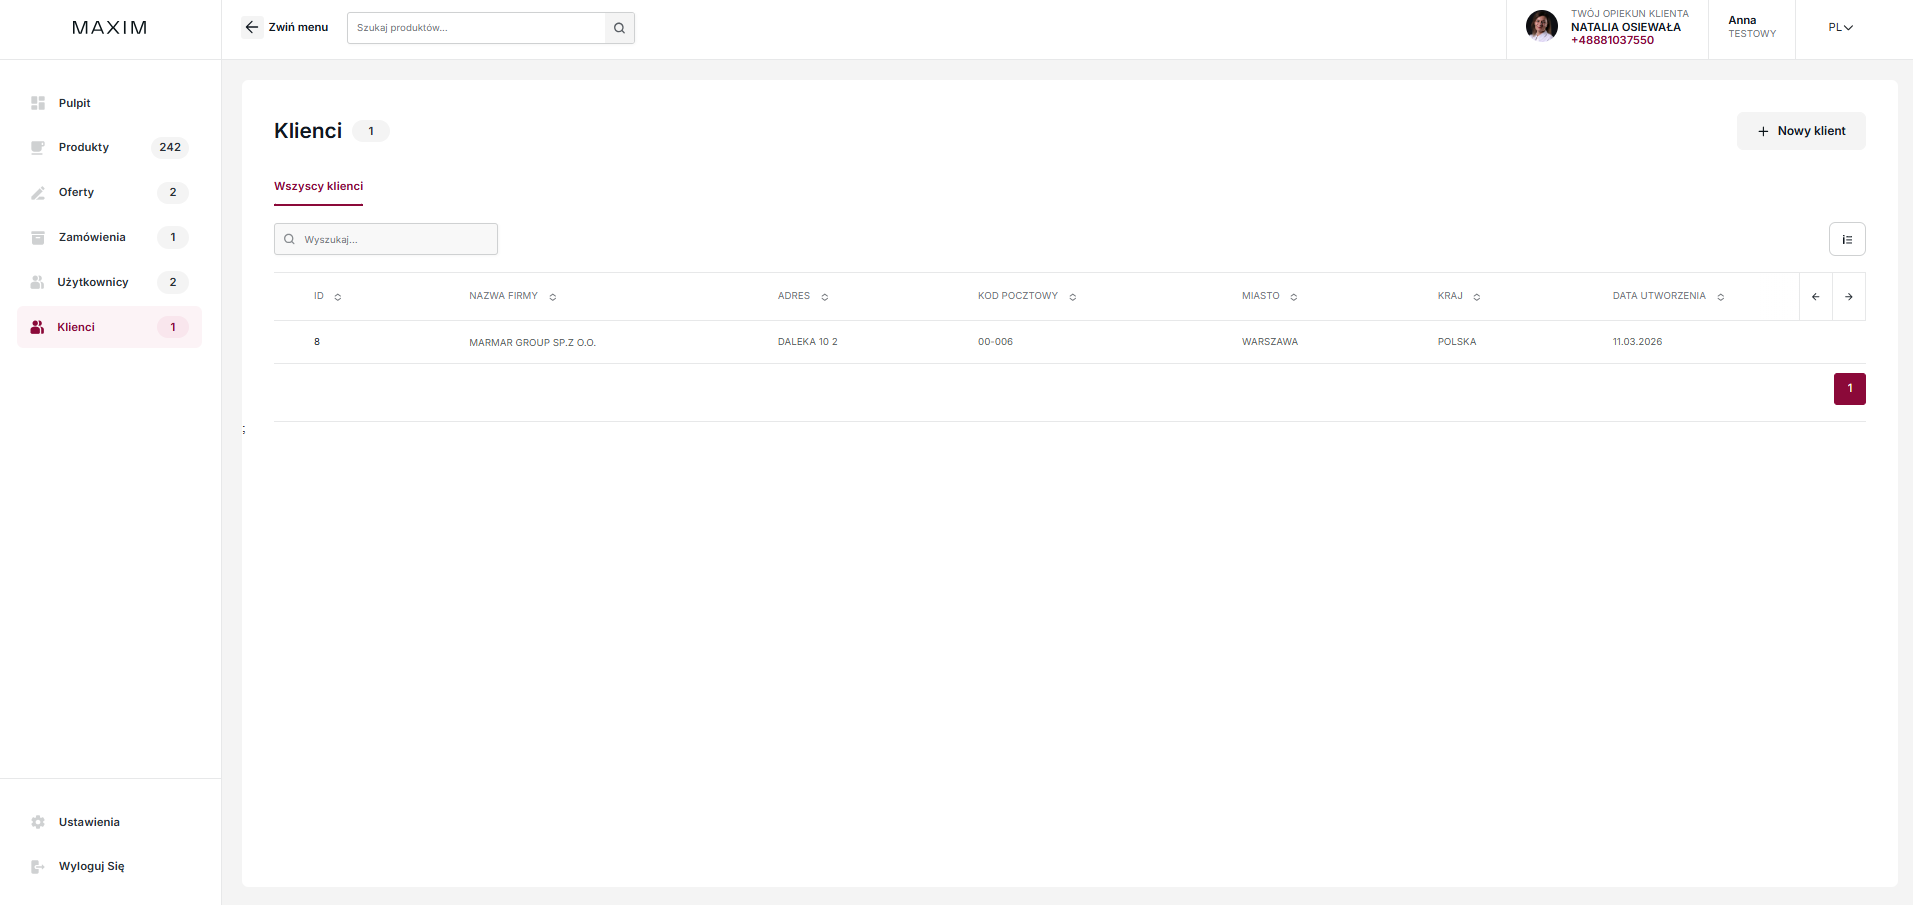
This view is a central database of customers entered into your organization’s dashboard.
The functionality of this module is very useful for automating work in two areas:
1. Offer profiling: Selecting a customer from the database allows for instant assignment
dedicated pricing to a specific entity, which significantly influences the appearance of the offer.
2. Order Process: Data saved here can be added to forms
mail order, which eliminates the need to manually enter data for each purchase.
All records in this section are protected and visible only in the account of the given
agencies. This guarantees the complete security of your contact database – others
system users do not have access to it.
*NOTE: Data from your previous account at legacy.maxim.com.pl will not be automatically
transferred to b2b.maxim.com.pl . By creating a new agency account you will become its owner.
If you do not have this role in your company, please ask your supervisor to register you.


